Showing posts with label battle damage. Show all posts

6/01/2010

Material Reference Photos

 Whenever I've embarked on most of my painting or modeling projects in the past few years, if the subject is something that has reference to anything in the real world or if there's materials or patterns or any other specifics that I'm not outright familiar with, I've generally done research or image searching online to get a bit more comfortable with things before I start the actual work. This was especially true when I modeled and painted my 2007 Chicago GW Golden Demon Painting Competition entry, Gandalf at the Bridge of Khazad-Dûm. I must've watched The Fellowship of the Ring film itself about 10 times for general inspiration, the combat sequence between Gandalf and the Balrog alone at least twice that many times for details on posing and atmosphere, and looked up a ton of reference images online in preparation. I covered a lot of relevant subject material in researching online, even down to the particular weaving of Gandalf's robes; granted, the movie watching was much more enjoyable than the apparel writeups, but it's all good. (I must have done something right, because the finished figure went over much better than I expected at the Golden Demons!)

 At any rate, one of the things that I think helped me win an award was the specific attention to detail - this isn't anything that I was told by the judges, or anything that I've read or referenced elsewhere, simply personal opinion. Things like the particular color of the robes illuminated in the scene, or the angle of his arm holding the staff, or the color of the rocklight in the background of the scene; details that if they weren't there, the scene would've still been complete, but would've been missing out on its authenticity or "realism". It's with this same idea in mind that I've since been researching particulars about different materials that I might paint or model up in fine scale on a miniature figure or display base, things like aged brass or chipping paint, the colors and plants found in a generic near-tropical swamp or the ground texture of a washed-out ash wasteland at the edges of a desert - places or things I might not necessarily have been to or seen firsthand, or have readily available for reference, but am trying to replicate on a small scale through paint or modeled appearance.

 Now some of these materials and images might be a little more disturbing or graphic than the pictures of weathering I posted some time ago, so if anyone is sensitive or squeamish, consider yourself warned (I've left the somewhat more unsettling subject matter until towards the end):


Expanse of ash waste, with the ocean in the background - taken from the Internet, used without permission
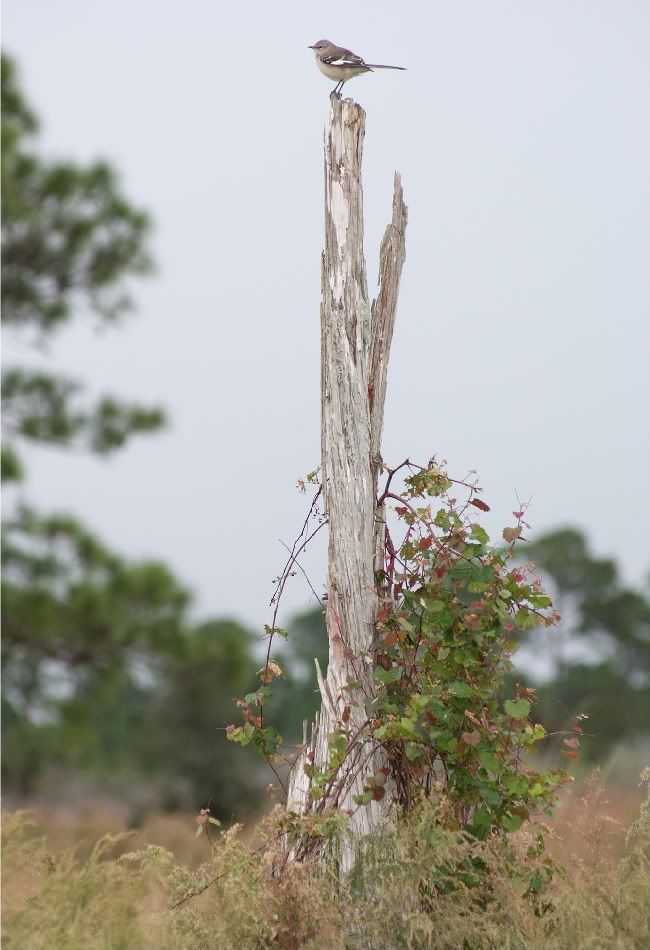

Weathered and sunbleached tree - taken from the Internet, used without permission


Waterlogged dead willow tree - taken from the Internet, used without permission


Generic swamp with brackish water, presumably southeastern United States - image originally from iStockphoto.com, used without permission


Brass pipes and fittings with patina - unnamed southeastern Michigan restaurant


Interestingly shaped new-fallen snow "spikes" on a stainless steel gate - casa Tinweasel, Feb. 2010
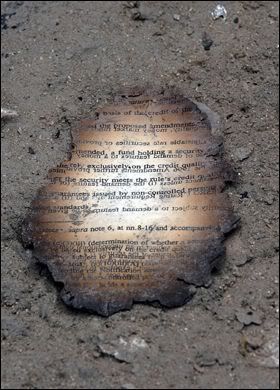

Fire-charred paper - World Trade Center Ground Zero, taken from the Internet, used without permission


Tank with battle damage - taken from the Internet, used without permission


Destroyed apartment buildings in downtown Beiruit - taken from the Internet, used without permission


Destroyed city street in downtown Beiruit - taken from the Internet, used without permission


 This would be the point where the pictures start to get a little unsettling in subject matter so, again, consider yourself warned.
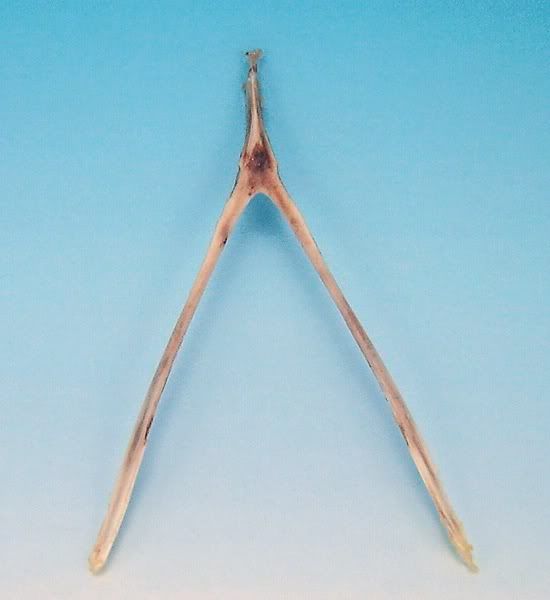

A cooked turkey wishbone with dried blood - casa Tinweasel


A burned corpse in a military vehicle - taken from the Internet, used without permission


A live human brain infested with housefly maggots - taken from Snopes.com, used without permission

 If the owners/original photographers of any of these "material reference" images would prefer me not to have a particular picture posted, let me know and I will certainly take it down.

5/01/2010

Former Heresy-Era Rhino

It's still a work-in-progress, but I'm far enough along that I figgered I'd post pictures. I've been working on it for a long while in fits and starts, but it's at a point where my plans for the thing are finally starting to pan out (or so I think!) Ideally, I'd like to get some feedback on the overall appearance, battle damage, and hammered metal alternate paneling on the right vehicle side.

I didn't want to go with strictly a Mark I Rhino conversion, because I do like the Mark II style doors and design. I wanted it to look like it's been around a long, long while - like 10,000 years in and out of the Eye of Terror on various campaigns with my Disciples of the Four warband. I'm keeping with the design theme that this has seen long use and has "mutated" over time in service to all of the Chaos Gods - as such, it's not specific to any one Chaos Power, and I'm going to use it as the command Rhino for my warband. I'm going to use the same color scheme as for the majority of my troops - a dark, fleshy red with dark purple accents and semi-quartering (although maybe not on the Rhino, painting schemes being what they are). In any case, the insignia of my warband is going to be prominently displayed on the front panel of the vehicle and likely on the top (so it can be seen "from the air" by any Shriven-related support vehicles).

Many thanks to DeSnifter over at Warseer for his Rhino conversion templates, which prompted the initial turning of gears in my thinking! One big change is that I wanted a bit more "depth" for the side venting panels, so I've used fine gauge chicken wire inset over a thin styrene backing - well, that, and I've liked the design style of the Vindicator ever since it came out, so I wanted more of a reinforced armor front facing for my command Rhino.

10/10/2009

Weathering Reference Photos

 Last Friday on the way home from work at a new position in downtown Detroit, I figured I'd take my time driving and snap some photos of examples of environmental weathering, paint chipping, collapsed buildings, fire-damaged structures, and some unfortunate examples of "urban decay." I've had a number of jobs around Detroit over the years and have seen a lot of sights similar to the images further down - while I can't say it's not somewhat saddening, I also think these images make for good reference pictures for modeling different weathering/environmental effects. I added a few more pictures to the lot en route to other destinations this week, but essentially they are all in relative time/place order if one were to follow a slightly wandering path.

 Just for information's sake, I don't generally pick up a camera to go and shoot images of "urban decay" as a matter of course. Our cell phone plan allowed us to upgrade to Blackberry phones, and this initially began as me testing out the surprisingly good built-in camera after taking a detour past a major backup on the I-75 expressway. Another reason I went through areas I've been through many times before taking reference pictures of this kind of stuff is that I plan on replicating similar environmental effects as a basing theme of sorts for any figures I finish on several small 40K "armies" currently in progress.

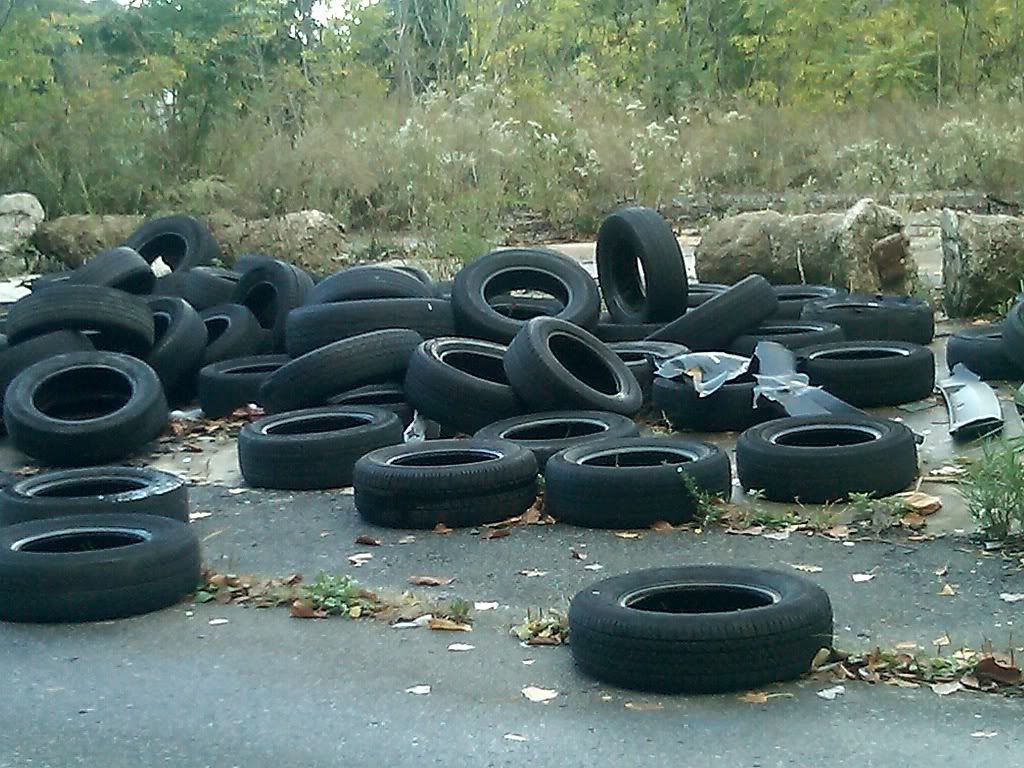
 While there's a lot of nice parts of the city, by and large they are along the main roads and mostly centered around buildings/areas of significance. Sad, really, as there's a lot of cultural significance to many parts of Detroit. In contrast to "built up" areas, there's a great many midtown Detroit neighborhoods that have reverted back to a quasi-rural state, mostly from population relocation/abandonment. About a half mile from one of the "built up" areas of the city, for example, you might find yourself in an area of boarded-up buildings, razed plots of overgrown land, vacant properties used as dumping grounds, and the occasional long-term resident with no "neighbors" visible in any direction - that's essentially the case in the progression of photos here. I took most of these pictures along a trip north on Mack Ave from Woodward in midtown, west along Brush St to near Interstate 94, detoured slightly off the service drive of I-94 near Mt. Elliot, and then through one of the neighborhoods off northbound Gratiot about a mile or two south of 8 Mile Rd - essentially the rough boundary of northern Wayne County.

(Click on the thumbnails for 1024x768 res pics - 56K users beware!)

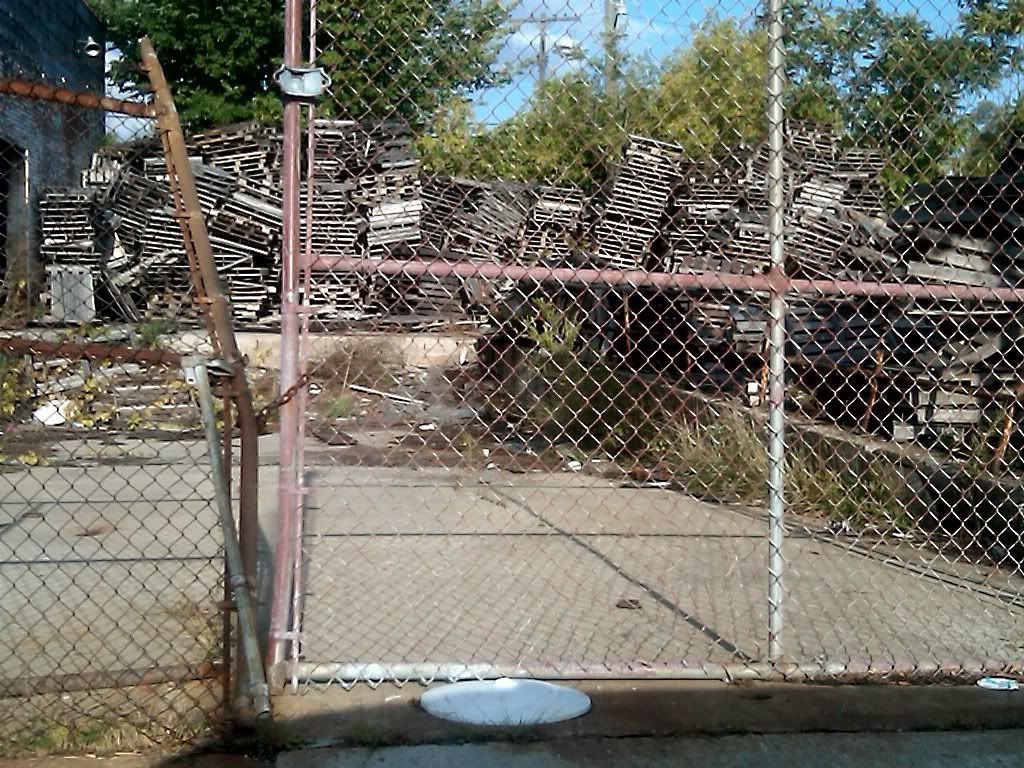
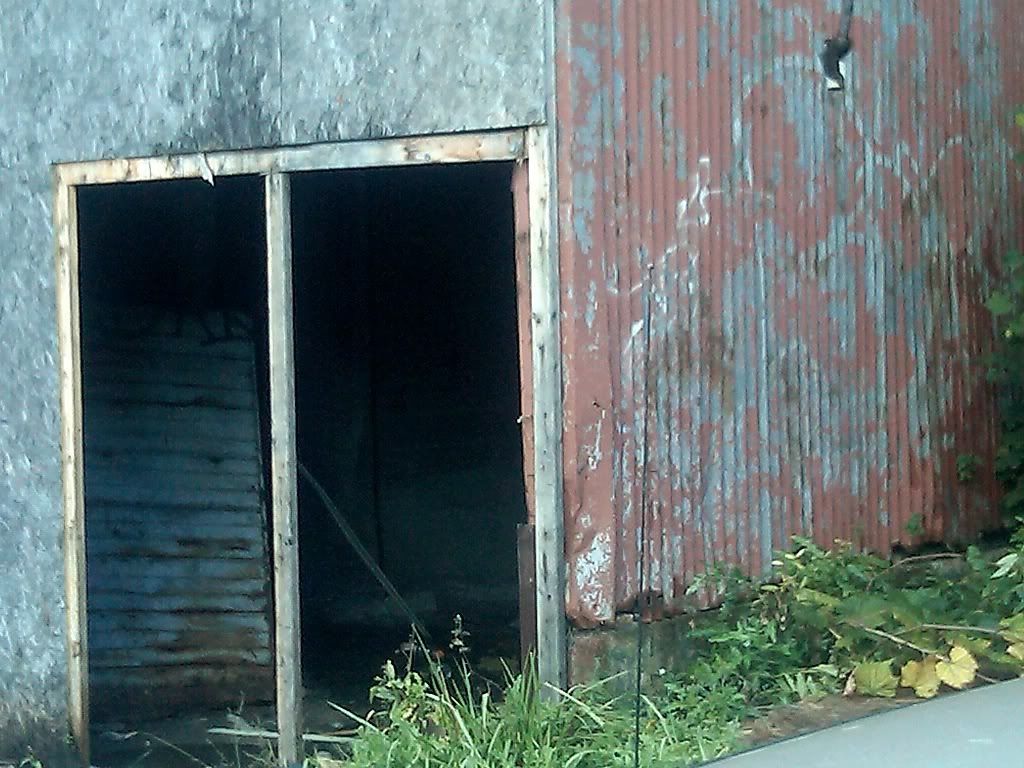
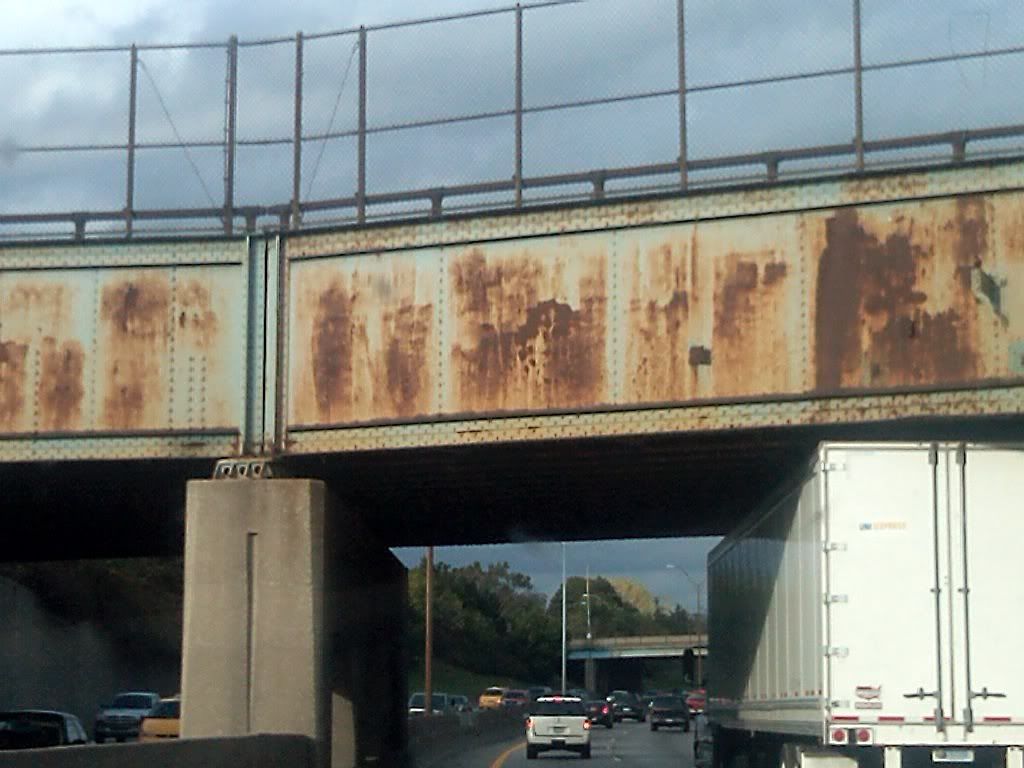
Corrugated metal, weathered wood and cinder block, likely gang tags, and (hopefully not visible) a family of feral cats amongst the trees/undergrowth


Closeup of weathered cinder block and rusted/heat damaged sheet metal vent


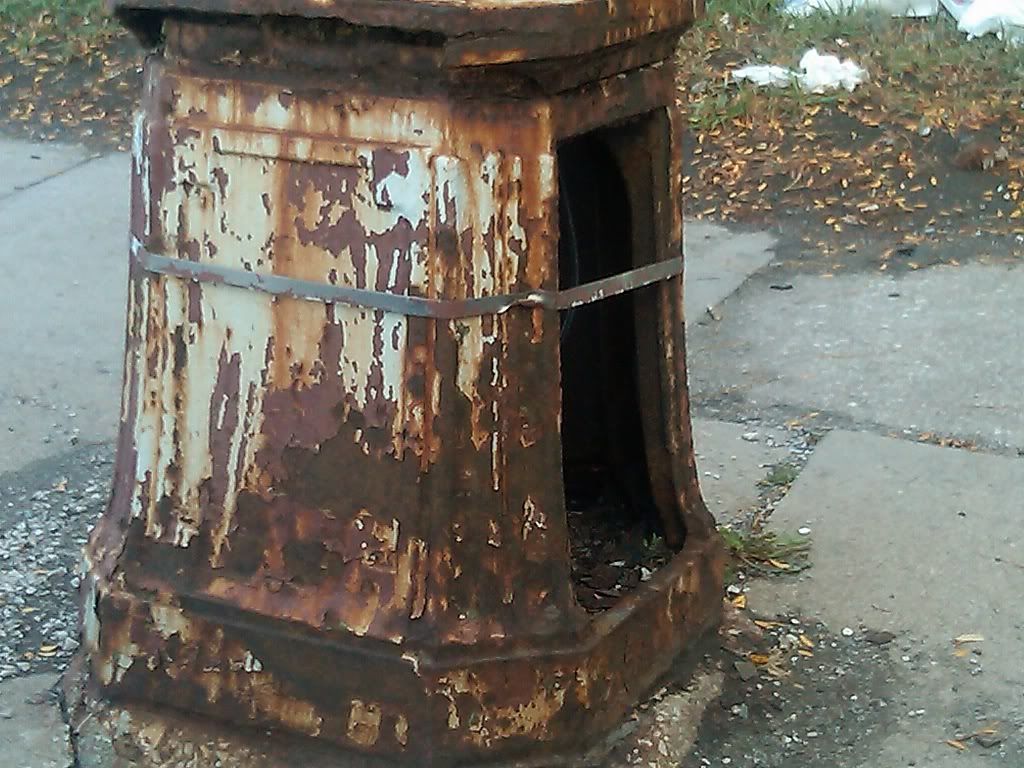
Rusted metal, weathered stacked plywood, overgrown concrete and damaged fencing


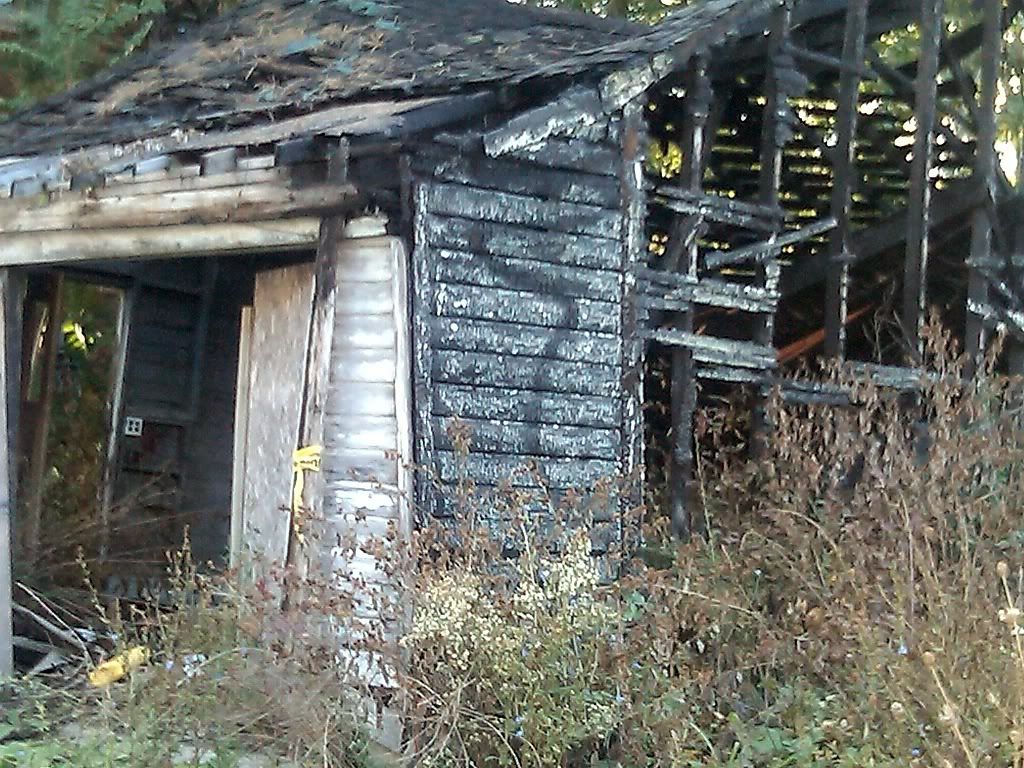
Burnt out timber and roofing, chipping painted wood


Overgrown burnt out building/vehicle w/ several overgrown gravel mounds in foreground


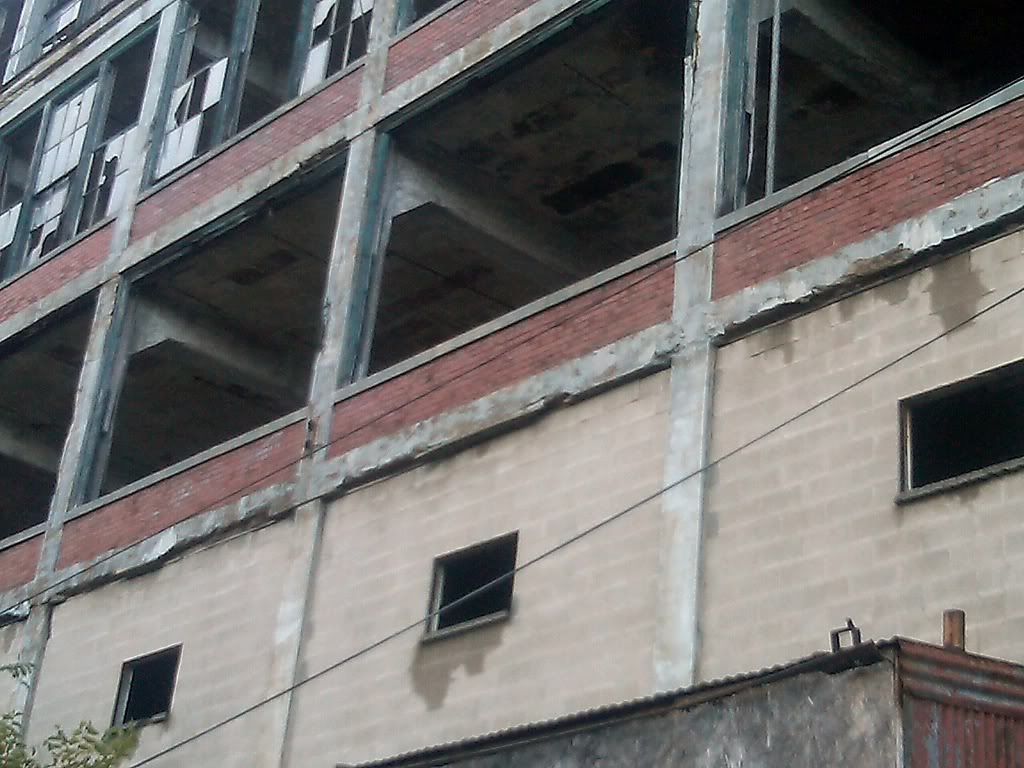
Collapsed building due to fire damage w/ collateral fire damage to adjacent brick


Burnt down structure being overgrown - surprised the heck out of me, but in stopping there briefly I flushed out a huge pheasant from the undergrowth nearest the former building


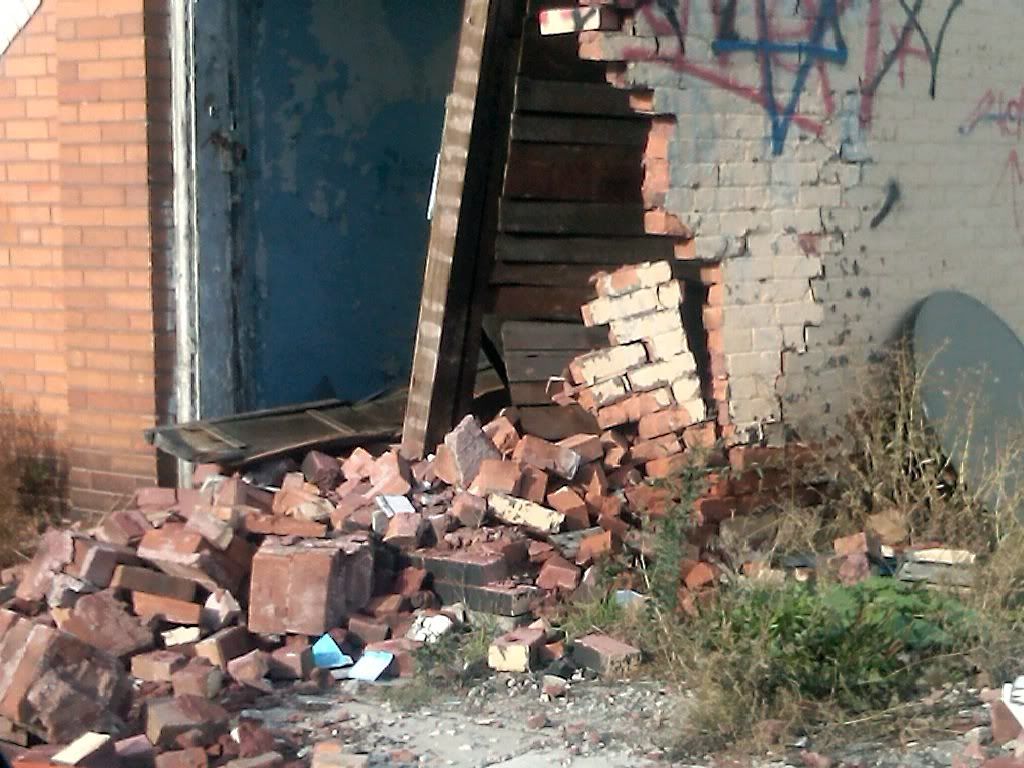
Naturally decaying brick facade due to exposure w/ staining/exposure on adjacent structure


Collapsing brick wall, chipping/peeling paint


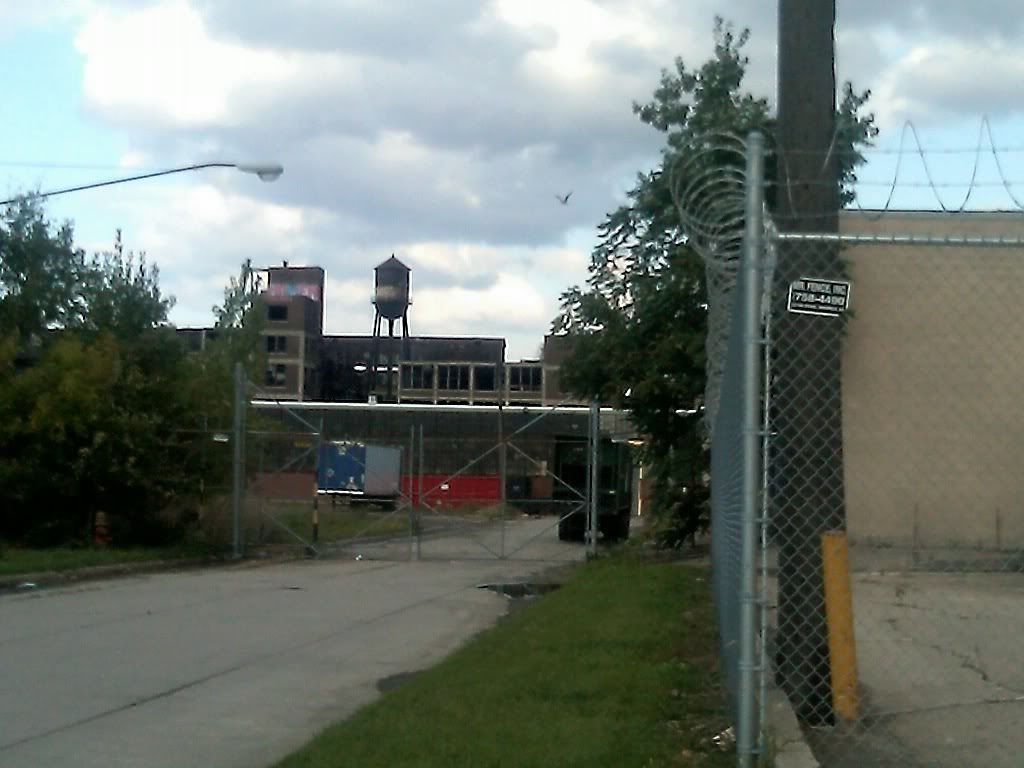
Distance view of derelict factory-type structure


Images of effects of weathering/paint chipping/rusting/fire on various materials


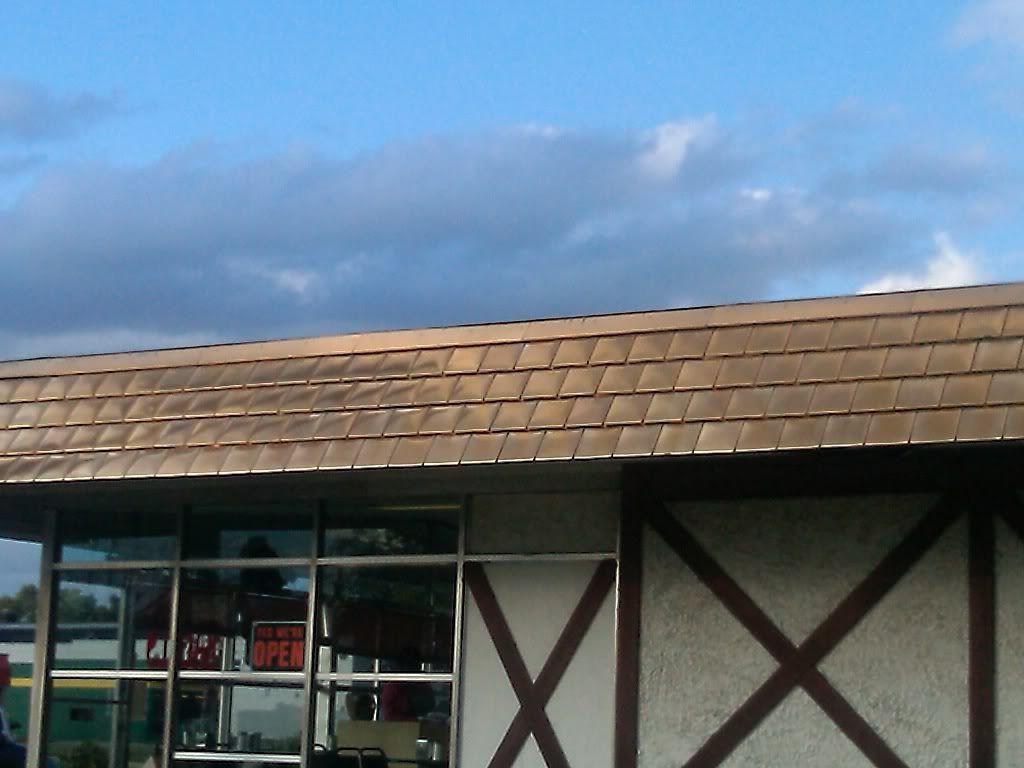
Large patterned gold surface in daylight (I've been impressed with the appearance of the roof for a while, but never had a camera)


(Same as above, but from a different light/camera angle)


 I drove by some shady/depressing stuff for some of these pics - a few crack houses, a likely prostitute who noticed me parked and started towards the car before I drove on, the "bread van" making the rounds at one of the 24-hour warming centers for the city's homeless/indigent, a seagull exploding in a cloud of feathers in the middle of the street after being hit dead-on by a car and an outright not-so-subtle drug deal going down on one of the residential streets that (coincidentally?) had one of the better examples of a burned out building when I turned the corner at the end of the same block. Probably the only cheerful thing out of the whole lot would be the "donut 'n' coffee" shop, so I saved that for the end - it's been there for ages (and so is presumably good - dunno, I've never stopped in) but the golden metallic-paneled overhangs are a recent addition (past year or two) and look positively amazing on a nice day with sun.

If by some chance the owners of some of these "reference materials" would prefer me not to have a particular picture posted, lemme know and I will certainly take it down.

9/26/2009

Hobby Tip - Making Rounded Rivets, Pt. 2

 Now for the actual process of making rounded rivets. The initial introduction and materials summary can be found in Part 1.

 Let me put out a disclaimer of sorts to start with here before delving into the actual step-by-step. I know there's likely a ton of other methods out there for making rivets and there's nothing especially earth-shattering about my own method. Three other techniques I'm familiar with are: using small dots of PVA glue to build up a "rivet" shape, gluing small plastic bead-shaped "spacers" from a water purifier filter into place in shallow drilled divots, and simply using round styrene rod thinly cut into measured "rivet-height" lengths and glued where needed.

 I think this method gives a reasonably realistic-looking end result and I've found it to be a bit more durable than glued-on rivets, where I've frequently had my rivet work scrape off or easily get knocked off - especially when working with metal figures where the plastic-to-metal bond isn't so strong. I've also found the "rivet setting" part of this writeup to be equally useful for other things like small studded spikes or even horns on figures. The downside to my rivet-making method, and I'll lay it out plain now, is that the "setting" part is slightly more time consuming than some of the other approaches mentioned above - on the other hand, if you make a whole lot of rivet "blanks" in batches during down time (like when watching a movie you've already seen a hundred times), then that's the bulk of the work done and the rest is just placement.

 I would suggest to anyone trying this method of making rounded rivets that they take all safety precautions necessary - there, that's my public service announcement duties covered for the month. No, really, I personally check over all my equipment and tools before I start any work to make sure that nothing is damaged or compromised, that everything is firmly tightened and nothing is out of place and that my eyes are shielded from possible flying debris. As a general rule, I always try to use my Dremel immediately over (if not slightly within) a small, portable wastebasket so as to minimize the odds of something being flung loose as well as to collect as much waste, dust, and stray particles as possible.
  1.  To get started, take a length of the 0.4mm diameter round styrene rod and set your Dremel on the lowest speed setting with a medium sanding disc firmly in place. You want to hold the length of styrene rod perhaps 1/4" up the rod from the end to be shaped and be sure that you always shape the end of the styrene against the portion of the medium sanding disc spinning away from you. (I'm left handed, so for me that's the bottom.) You might want hold the styrene rod with hobby pliers, forceps, or even tweezers - anything so long as you can maintain a firm grip on it. Myself, I'm comfortable pinching the rod between my fingertips with the remaining length pointed outwards away from me while shaping it, but I also have very steady hands and maintain a constant focus on my work to avoid injury. (At the lowest speed setting, my particular Dremel can be used for polishing, light finish woodwork, or even shaping and buffing fingernails in a slightly different hobby; I wouldn't use my hands to hold material at any higher RPM settings, however.)

  2.  Even at the lowest speed setting, the medium sanding disc is capable of melting the styrene rod through friction - we actually want to take advantage of this as it makes the shaping process easier. With very light taps of the end of the round rod against the portion of the disc spinning away from you, twisting the rod slightly at every tap to expose a new face to the sanding disc, holding it at about a 60° and you'll start to see friction melt the styrene in the shape of a rough "bullet" point. I should note that at a low speed setting and with about 1/4" of the styrene rod exposed, you'll find that the end "jumps" constantly away from the disc while shaping - this isn't necessarily a bad thing as it limits the amount of time and friction that the styrene is exposed to in contact with the sanding disc, but it does take some getting used to.

  3.  Gradually you want to move the very end of the now-semi-pointed styrene rod to more of a 45° angle in relation to the disc, and maintain the process of touching the very end against the spinning disc with very light taps while making sure to twist the rod slightly at every tap to expose new surfaces to the disc. You'll quickly note that it begins to assume more of a rounded aspect at the end.

  4. At this point, you'll likely be able to finish off the rounding process with extremely light taps of the very end of the now-shaped styrene rod end against the sanding disc, again making sure to continue twisting the rod with every contact - if done lightly and carefully enough throughout the whole process, you should essentially have a smooth, natural rounding to the end of the styrene rod with a minimum of wasted material. If the shape is slightly off that's not necessarily a bad thing, as the appearance when eventually mounted on the figure can help to contribute to any "battle damage."
 My first attempts were a bit rough looking to start, but if you do things right you ought to end up with something along the lines of the rounded-off example on the right:

Sample Rounded Rivet picture
 At this point you cut a short length off of the styrene rod in addition to the rivet - I'd suggest about a millimeter or so, but it all really depends on how much depth you have in the area you're wanting to place your rounded rivets.

The next part is relatively straightforward: for the sake of consistent spacing and level appearance, you'll likely want to take a ruler and a soft lead pencil with a good point and go along and mark where you're going to place your rounded rivets - you'll know before you start the next step of drilling if things look good appearance-wise, and you can always adjust your planned placement at this point since everything is simply markings on the figure. I prefer to use mechanical pencils with 2B grade lead for as they make clear marks even on metal figures, erase fairly easily afterward and are soft enough that they don't gouge sheet styrene if you're doing layers of custom conversion.

 Now you take your drill bit that matches as closely as possible to the diameter of the round styrene rod you've used to make your rivets, and sink placement holes to at least the depth of your length of rounded rivet (remember I suggested cutting them off the rod in 1mm segments or thereabouts). You might want to drill slightly deeper than the length of your rivet cut-offs, since you can always put a little extra glue in the hole and simply hold the rivet in place to the correct depth until the glue sets up a bit.

 Once you've got your holes drilled for placing your rounded rivet lengths, you'll want to use tweezers or something similar with a narrow-but-firm grip to hold the length of rivet near the top, apply a small amount of cyanoacrylate glue (CA glue, Krazy Glue, Zap-A-Gap, etc.) around the lower end of the rivet length and, placing the end into the hole you've pre-drilled, hold it at the height you want the final rivet to stick out (or course, this assumes that you may have been a little off on the depth of the hole - if you're able to drill precisely right or have the foresight to test fit and/or shorten the length of the rivet "insert" before gluing and slotting it home. I would suggest CA glue over polystyrene (plastic) cement, since an excess of plastic glue on the slotted end of the rivet when mounted in/on a plastic figure could creep up and deform the rounded rivet shape at the visible end that you've spent your time making. CA glue also allows a bit of leeway in terms of adjusting the fit of your rivet before it sets, tends to fill any gaps better if your holes weren't able to be the same diameter as the styrene rod you used, and can be wiped away without melting/distorting the final appearance of your rounded rivet if you did happen to use a little too much glue at the base before slotting it home.

Here's an example of rounded rivets made following the guidelines above set into a sheet styrene "plate" over the skull of a converted figure:

Skull Plate with Rivets
As you can see in this close-up picture of some finished ones I've left some of the rivets imperfectly shaped and in a few places not put anything into the holes I've drilled for them, all with the idea of getting across battle damage, or perhaps "wear and tear" on the figure.

Here's more of the same with finished pictures of the rounded rivets in several places across a full figure, the same as seen in the top-down head picture above:

Inducted Ultramarine Berzerker WIP

9/23/2009

Hobby Tip - Making Rounded Rivets, Pt. 1

(Hey, what can I say - our whole family has been simultaneously sick and the 'Net seems to have eaten my first attempt at posting this, so here we go again.)

 Somewhat building upon last week's Hobby Tip, this one is geared specifically towards making rounded rivets in 28mm (or roughly 1/35th scale) as a part of converting your figures/models. The reason I say "converting" specifically is that it's a little involved and slightly time intensive to get set up, but once you're rolling along you can make any number of rivets for use at a later time - and the rivet "setting" can be done at any point if you have an appropriate-sized drill bit and pin vise (or improvise, as I'll get to).

 To start with, here's a picture of the materials you might likely need:
Making Rounded Rivets Materials
Out of all the items in the picture, the most important material would be styrene rod of a very small diameter: here we have .015"/0.4mm diameter in a package of 10 - it might not seem a lot of round styrene rod, but given the output product it tends to last quite a while (of course, that also assumes you're not covering an entire Games Workshop Baneblade conversion with these - if you were, I'd probably recommend a larger diameter of styrene and a less involved method and/or the services of a good, professional psychiatrist). By personal preference in making rounded rivets, I'd recommend Plastruct styrene products as they seem a little more accurate/precise in their measurements and also seem to be generally available in smaller diameter sizing, but conversely are also slightly more expensive (or so it seems locally) than other generally available manufacturers, such as Evergreen Scale Models. Just for comparison's sake, I included a length of the 0.4mm round styrene rod next to a length of 0.5mm rod: there is a difference appearance-wise and scale-wise on the final figure, but you can reasonably use this rounded rivet method with any diameter of styrene rod - I'm thinking that for "chunkier" sizes, though, you'd have to be a bit more thorough in your rounding off, whereas the smaller diameters will look good even if slightly uneven.

 In the image above we also have two grades of sandpaper - medium-fine grit (120) and 800 grit wet/dry - both of which you might try, although I'd lean more towards the medium-fine 120 grit myself if I'd be doing this manually. I've shown my variable-speed Dremel with a medium grit sanding disc mounted - this is actually the means by which I'd recommend you round off your rivets and the method I'm going to focus the Hobby Tip writeup on, but this is straightforwards enough that you could likely settle on a sandpaper shaping method without too much trouble (and I'd recommend rounding down the styrene with a fingertip pressing the very end of the rod lightly onto the paper, from past experience).

 There's several pin vises in the image - one of which is home made. The one without the rotating "hand rest" was the first one I bought (from Sears, I believe, although not a Craftsman product but a "generic" brand) and is perfectly fine and very inexpensive - it also came with an assortment of different bits. The other, slightly fancier one, was picked up at a train/model hobby store and was slightly more expensive (but still under $12) and did not come with bits but came with several "chuck" inserts of varying hole diameters. The reason I mention this is that ideally, for very tiny rivets using the method I'll be laying out, you need to drill shallow holes of matching diameter; the plain pin vise doesn't tighten enough to grip the size drill bit needed, whereas using a very small size drill bit in the slightly fancier one was a relative piece of cake. The third "pin vise" in the picture is actually a length of wooden dowel (end rounded with sandpaper for comfort) with the appropriate-sized bit glued into (via two-part epoxy and a thorough soaking of CA+ glue) a matching diameter hole to just below the beginning of the "threads" on the tiny drill bit itself - not the most elegant of handles, but it gets the job done and is easily portable.

 Now we get to the drill bit: a size #74 high speed twist drill bit made by Precision Twist Drill Co. (one of a bag of like 20 or so matching-sized bits) and the same diameter as the small "standard" rivet size as represented by Games Workshop on a large number of their 40K figures - also the perfect size to make holes to inset the previously-mentioned .015"/0.4mm diameter round styrene rod.

Now for the process! (In my next entry, of course...)

LinkWithin

Related Posts with Thumbnails

Followers: