Showing posts with label commission. Show all posts

12/31/2013

Call of Cthulhu - The "Mad" Doctor

Edit: Updated with color recipes used!

 It's been a little while since I finished the figure and got approval from the client to keep on trucking, but real life has intervened and thus a lagging blog post. I'd like to think it was worth the wait, though, as I've got hi-res pics and there's a few areas that I think turned out very well that I was to touch on.

 For starters, this figure is part of an investigators of the unknown set (exact product/part # unknown) released by RAFM specifically for Call of Cthulhu. He looks to me like a doctor with a kit bag and a vague air of professionalism - in reality, the figure struck me as extremely creepy and representative of the religious cult leader from Poltergeist II, so that's what I rolled with in the final presentation.


 I was aiming for a paler "realistic" skin tone than I've used in the past, and made specific effort to accentuate the shading in places like the hollows of the cheeks and around the eyes - in reality, some of this was a "trompe l'oeil" effect on my part, as the sculpting was a little misshapen and the left and right sides of his face actually don't match up well. Anyhow, from extreme shadow I went through 6-7 color progressions to almost a near white for the facial highlights on the bridge of his nose, his upper cheekbones, and the pate of his skull as I really wanted to accentuate a somewhat skeletal appearance.

 The blacks I used in the figure are two different shades, having used cool colors for his suit from a cold grey-black worked up to highlights of pure neutral grey and Vallejo Model Color Deck Tan worked in (I love this color!), with pure black shading; and for his hat and shoes, and wanting to make the hat somewhat of a warmer color to draw attention up to his face, I went from pure black straight to highlights with Games Workshop Graveyard Earth worked in and Graveyard Earth/Deck Tan for final highlights.

I really like the way the stone turned out, and despite the appearance in pictures, there's not a single element of grey at all!

Edit: Color recipes!

The "Mad" Doctor's Skin Tones
 As mentioned in my previous post, I approached skin tones on this figure differently than I have in the past, mostly for the sake of trying something new. I've had the Reaper Master Series Bright Skin triad set for some time, but never used them outright, so there's that. I also have had some untried recipes for flesh color progressions thanks to Keith Robertson of Forge World/Games Workshop fame and an old printed article from Mike McVey's painting site (Raven Priest Assembly and Painting - Pt. 2). I took the Reaper paint set, combined the two recipes with some tweaks for an older, paler-looking flesh tone, and went to work!
  1.  To start with, I painted all the skin areas using several thinned coats of Games Workshop Tallarn Flesh, although really any dark neutral tanned flesh color would do.

  2.  I applied shading with a mixture of Tallarn Flesh and Vallejo Model Air Dark Green, being careful to only apply this to areas where shadow would naturally fall - on the face I painted this color in the eye sockets, from the below the cheekbones down, under the nose and lips, and the entirety of his neck.

  3.  I added a deep blue to the shade mixture, in my case Vallejo Model Air Intermediate Blue (or an equivalent royal blue) and painted this onto any deeply recessed shade areas - on his face I worked this into the tops of his eye sockets, directly under the cheekbones, beneath where his hairline met skin, and the neck recessed within his collar.

  4.  I began the highlighting and defining process with slightly thinned Reaper Bright Skin color, essentially working over any skin areas untouched by shading and taking care to draw the color upward with my brush to the above-lit areas I was trying to represent.

  5.  For the next highlight step used thinned Reaper Bright Skin Highlight color, accentuating everything from roughly a 45° angle upwards, making sure coverage on his bald pate was good, as well as touching up his lower lip and eyelids slightly.

  6.  For the next highlight step, I added pure white to the Reaper Bright Skin Highlight paint previous and accentuated everything visible from roughly a 75° angle upwards, again making sure coverage on the upper surfaces of his bald pate were nicely transitioned, as well as focusing on areas like the bridge of his nose, his upper cheekbones, hints of color on his earlobes, and the sinews of his hands.

  7.  Finally, I went back with thinned pure white for the final highlights, applying them minimally to areas where I wanted to draw attention as well as play up his somewhat skeletal appearance - the vertical lines at both temples, the bridge of his nose, and the very top of his bare pate.

  8.  I did need to go back and smooth out some of the transition of the facial shading so for that I went back in with a 1:1 mixture of Vallejo Model Color Russian Uniform (great color, btw!) and the basic Reaper Master Series Bright Skin color thinned so as to more smoothly transition the lighter color of the jaw evenly on both side of his face into the shadow under his cheekbones (did I mention that the face seems unevenly sculpted on both sides? Oh well, that's why this one's a classic!)

The Stone Base
 This is actually one of my old color recipes that I tweaked slightly for this model, as I wanted the stone to be less"warm-looking" so as not to detract from the cooler palette of the rest of the figure.
  1.  To start, I applied a basecoat mixture I've had for ages (Games Workshop Chaos Black and Snakebite Leather mixed - only this is the Snakebite from the early 90's color range that was a dark brown) - you can use any neutral dark brown, but a good equivalent would be the P3 Battlefield Brown color - just make sure you have good coverage over any areas you want to look like stone.

  2.  Next, I heavily stippled slightly thinned Battlefield Brown all over the stones - the trick when I'm stippling or drybrushing is that I thin my paints about 1:4, so that when I wipe away most of the liquid out of my loaded brush, I never have to worry about it laying on too thick or dark, because it was already somewhat diluted at the outset - this makes for an excellent "dust" effect on figures using different colors, by the way.

  3.  Trying to avoid any warmer colors in the paving stone basing, I next lightly stippled thinned Vallejo Game Color Khaki over all the stone, but with greater attention paid to upper areas.

  4.  The first actual highlighting I did was with (again) a thinned color - this time Vallejo Model Color Deck Tan, which is an excellent light cool beige-grey. I drybrushed this color primarily on edges using a squared-off Filbert synthetic brush - I like the brush shape (think tongue-depressor roundness) as it allows me to drag mostly along sharp edges, and I like synthetic bristles for drybrushing as it chews up natural hair brushes like nobody's business.

  5.  The final highlighting on the base was more drybrushing with a thinned pure white color, being very careful to only apply it to edges and raised stone edges on the base with very careful dragging.

  6.  The very last step on the base was a wash of a mixture I've had for ages - 3 parts Brown (or Sepia) Ink, 1 part golden yellow paint, and 1 part mid-range green all mixed together and painted more or less once over all the stone and then primarily into the crevices to darken things down a bit.
That's basically it for the color recipes and painting of this figure - feel free to drop me a line or post any feedback!

5/21/2010

Commission Giveaway Contest, Revisited

 Well, some good news I got today is that the Speculo Killer figure painted for doom_of_the_people (after he won the Commission Giveaway Contest) is now safely in his hands after delivery by USPS.

 One slight downside is that despite creative packaging and a lot of well-wishing, the figure arrived tipped over on its side inside the box - that essentially means it shimmied loose from being bound upright through holes drilled in a piece of hardboard that itself was hot glued to the bottom of the box. So much for marking the box "fragile" and labeling all four sides with which direction was "up" - it could've been worse, though, as I'm to understand all the only problem in transit was a somewhat bent monofilament blade (that was easily bent back to shape.)

 The great news I got today - well, for me and doom_of_the_people, anyway - is that "It looks awesome and definitely lived up to [his] expectations." (I was especially leery of the commission getting there in one piece because the figure itself was pretty fragile in sculpt, had a separate wrist join that was flimsy from the start, and was a decent amount of good faith on both ends. I'm very glad it worked out nicely!)

5/18/2010

Fun With Shipping, AKA Getting the Commission Giveaway Contest Piece In The Mail

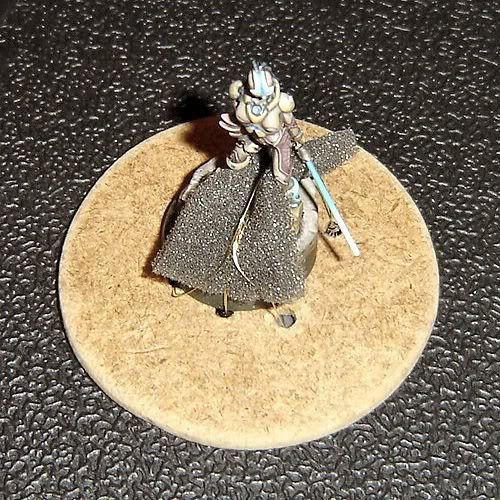
 This is the transport method I'm thinking about running with - the bottom disk is an old 60mm base I made from MDF hardboard:


 I'm thinking that if I hot glue the underside of the disk to the bottom of a sufficiently roomy box, then it should be golden and not shift around at all. The brass beading wire restricts movement but isn't so tight as to chip paint (I hope) and the foam there is for an added barrier to "insulate" the wire I've got wrapped around it. Something like this, I'm sure, would set off the "bomb squad" at an airport even though being completely harmless, no? Good thing it'll likely go overland, since it's being sent to a neighboring state...

5/14/2010

Infinity Speculo Killer Commission, AKA Giveaway Contest Winner [Completed 5/13/2010]

 Well, I got word back from doom_of_the_people on the last set of "inches away from finished" pics I passed along to him regarding his Commission Giveaway Contest figure, and I got the "thumb's up" to go ahead and call her done. She is now sealed in several layers of spray acrylic varnish and fully dry, essentially ready to wing her way towards wherever she'll be winging her way towards - as soon as I can figure out a way to box her for mailing in a manner that won't bend the "flimsy" monofilament blade or cause her wrist to snap off at the glued join (yet again). I think I have an idea, though, involving epoxy glue, a small hex nut and bolt, and a small box-end-sized square of MDF hardboard. It might set off metal detectors at the USPS, but it should have enough airspace inside the box to avoid nasty bumps and jarring impacts.

Here's the final set of pictures (post-varnish):


 In making the sludge/ooze on the base, I snuck in a few bubbles(?) and some extra rust on the outpouring pipe, too. Hopefully they're easily visible in the last few pictures, since I took those especially for the guy running Secret Weapon Miniatures, figgering he might be able to use them for posterity so as to show off his handiwork. The majority of the decorative stuff that the Speculo Killer is posed on is one of Secret Weapon's resin bases that I hacked up and converted in order to offset it on the Infinity slottabase that the figure came with - who knew cast resin bases were so versatile?

5/12/2010

Infinity Speculo KIller WIP [Update 5/12/2010]

 I think I'm about close to done with the Speculo Killer, especially after this morning's pleasantly surprising work of tying things together - it seemed like my brush was on fire (not literally, of course, I've plenty of water on hand) and there's the nice fact that I was actually able to see without blurriness, as has been the case for the past several weeks. (Allergies? Need new glasses? Remnants of pink eye/styes? Dunno, but I've got a referral to an opthalmologist I will most certainly be following up on...)

Anyway, enough about the blessings of Nurgle, here's the latest update:


 I'm thinking all that I need now is to sort out with the Commission Giveaway Contest winner, doom_of_the_people, what color he wants the ooze coming out of the rusty pipe (although I'm still entertaining suggestions/comments/critiques, because it's "not quite" finished).

5/07/2010

Infinity Speculo Killer WIP

Work continues on doom_of_the_people's Commission Giveaway Contest figure, albeit with another commission I'm prepping in fits and starts in the background and a few other things going on (we adopted a puppy last week, for instance, to "replace" the one that died of parvovirus a few months ago - I never realized how much adjustment it takes bringing a new animal into the house!)

At his request, I've done a fair amount of weathering and sun-bleaching effects on an "autumn"-style color scheme. The underlying armor panels are brownish-yellow and orange-yellow, alternating in parts, and the whole figure has been lightly airbrushed with an off-white - I'm still getting the hang of it, but it's a fun thing to play with. It was a lot paler until tonight, when I had the inspiration to add some additional cool coloration that ought to tie the warmer (if muted) browns and autumn colors in with the soon-to-be-glowing monofilament weapon and a few other (surprise!) Object Source Lighting effects. I used an initial glaze of GW Shadow Grey brushed towards the crevices across the figure, followed by a Shadow Grey/VGC Sepia Ink mixture to delineate the panel lines and such a bit more - I'm aiming for a look of grime deep-set in the crevices of the armor, or possibly dust mixed with oil.

Anyhow, here's the figure as of this evening:

I've already started with basecoating the Secret Weapon Miniatures base on which she stands, which ideally will end up looking like broken concrete - I plan for the pipe to be oozing something vile (with continued approval, of course).

4/16/2010

Decisions, decisions...

Do I prefer an airbrush or a paintbrush now? Do I paint the segmented protrusion coming out of the Plaguebearer's mouth so as to make it resemble a giant, pasty-looking maggot, or paint it up as a dripping, putrefactingly rotten tongue? Anyone have any suggestions?


I've been trying out some new stuff here over the past few days - one of these figures was airbrushed with some additional shading touch-ups via a brush which were then gone over with an empty airbrush to drive the thinned paint into the depressions, and the other used the same colors but was strictly hand-painted via paintbrushes.

I must say I am certainly loving this airbrush, now that I've finally put it to use - it works especially well with washes. Even using windshield wiper fluid to cut my paints, the extra bluish tone from the wiper fluid adds a little extra something outside of the beige paints themselves. I applied a basecoat, two shading colors, and a highlight in about an hour! Whee! (I do have clear airbrush thinner, but I think I might stick with this wiper fluid for a while...)

I'm also pleased that my prep work on the Commission Giveaway Contest winner's Speculo Killer turned out so smooth. The figure is so delicate in appearance and what angles she has are so awkward - I wasn't sure I got everything or that things were smooth enough. After giving the figure a guide wash tonight on the "unpainted" parts, it looks like I covered both aspects well. Yay, me!

4/14/2010

Infinity Speculo Killer, AKA Commission Giveaway Contest WIP

 Like the title says, this is a work-in-progress update on the Infinity Speculo Killer that the winner of the Commission Giveaway Contest I ran a little while back had shipped to me to paint up.

 Before I get to that, though, a little summary of what I've been up to: our one-year-old son is now over his bout with pneumonia, none the worse for wear, and has added four more molars to his collection of baby teeth in the past few weeks. He's also managed to gain some weight with all this going on, so in short, he's healthy and our family's doing better. I finally got a chance to do something(s) I've been meaning to do ever since my birthday last August - clean up my painting area and build a new, narrower spray booth (cheap and easy and made out of cardboard and a shop vac, but still). I got a chance to do both of those these past few days, and actually took a first stab at painting via airbrush - no, not on the Speculo Killer, but on another figure for a competition over at the RelicNews Tabletop Painting & Modeling Forum. It's a GW Plaguebearer, and it now has a flesh basecoat - I figgered I'd take a stab with airbrushing with a Plaguebearer because even if I completely maul the painting, it'll still look good! (I'm breaking in the airbrush for a secondary commission I'm working on, and it ought to make basecoating the massive skin areas much, much easier and quicker.) Oh, and I don't have to serve jury duty as I was thinking I might - I got called off, so my weekdays are now my own again.

 That update of sorts out of the way, here's the Speculo Killer prepped, assembled, and pinned on her permanent display base! (Just ignore the bottle cap - it's not the base you're looking for...) I was pleasantly surprised to find that I had a pin vise drill bit actually small enough to fit within the socket of her monofilament sword arm wrist and even better, that I had something of a narrow enough gauge to glue in for a pin to keep her sword hand from loosening. The display base she's on is going to have a puddle of thick oil dripping out of the exposed piping that will look like it's pooling around the flat top of the slottabase that the concrete round sits on. Adding the liquid can wait until after the rest of the painting is done - I feel that sort of thing looks much better if everything else is painted and highlighted and then any semi-transparent liquids are applied over the top.

 By way of the current paintjob, just her bodysuit is fully basecoated and in an "alternating" pattern of sorts - looking at the figure after priming, I decided that the exposed scalp behind her face mask and her arm with jutting armor spikes might look best in some sort of flesh tone since there's enough open area to have a "triangle" of similar color to balance things out. I'm to understand the Speculo Killer in game background terms is a shape-shifting assassin, and so I think playing this up by way of contrasting "shifting" skin areas and a bodysuit covering the rest will look better than an even color of some sort all round (it also helps that the texture of the areas in question seems slightly different, which I didn't really see clearly until after I primed the figure.)

Here she is, in her current work-in-progress glory:


 I'm also working on a lava-themed display base to cover the large plastic sheet stock oval blank I posted a picture of not too long ago. I'm trying to evenly juggle two commissions simultaneously for the sake of fairness, on top of everything else, even though one is technically "free" via the Giveaway Contest. Pictures of the lava base should be going up soonish, time and luck willing - I need to finish detailing it first, as well as sculpting over gaps I've been filling on the massively diabolical figure that goes with the base.

4/07/2010

Reporting In, Sir!

 If anyone's noticed the relative scarcity of updates lately, there's been a few reasons for it. One is family stuff - trips out of town, wife starting a new job, our 1-year-old with pneumonia; the other(s) are that I've been trying to focus on the commission work I'm doing. I'm ready to start painting the Speculo Killer from the Infinity range, and was hoping to do so after getting back from a trip with two days that the kids would both be at day care - well, our son's pneumonia's scratched that "free time" idea for the most part, but at least now's the easy part in that I much prefer putting brush to figure. I generally dislike prepping figures since it takes me a long time being somewhat obsessive about mold lines and flush fittings and all that fun stuff.

 I also received another commission shortly after running the Commission Giveaway Contest, and while assembling and tidying up and gluing that is still underway, I will say this - it's not a GW Trygon or Mawloc, and it's not a Valkyrie, although it's up there in scale and will be mounted on a similar blank. It's something big and evil, and it's going to be going on this base:

 I cut it out of sheet plastic stock with an electric bandsaw, trimmed to shape with a heavy rasp, and then smoothed things out with a progression of sandpaper from 60 grit up to 800. It's fun to break out the big toys once in awhile, and thankfully our son's a relatively sound sleeper!

3/22/2010

Commission Giveaway Contest WIP

 I received the figure last week from the Commission Giveaway Contest winner, doom_of_the_people, after a little bit of discussion on what I was actually going to be painting for him. What arrived in the mail was a Speculo Killer from the Infinity figure line by Corvus Belli ("War Crow" in Latin, I do believe - cool!). In doing prep work on the figure over this weekend, although very delicate-looking and more slight in size than the Games Workshop figures I've generally focused on, she has a solid amount of detail and looks like she should be fun to paint up. The Infinity range is a "true" 28mm scale versus GW's "heroic" 28mm scale - more or less comparable to the Ral Partha and Grenadier 25mm figures I used to paint back in my high school days. She is, in other words, small but not "too small" and with a lot more detail to play around with!

The figure in question:

 We've pretty much settled on the color scheme with a little wiggle room here and there, and the basing should hopefully complement things nicely - I'll leave things up to the imagination at this point, since I will be posting work-in-progress updates on the figure as I go along and I don't want to spoil anything. The interesting part (well, one of them) will likely be the Monofilament blade she holds, as the plan is to paint it up with an Object Source Lighting effect on the rest of the figure.

3/07/2010

And We Have a Winner!


 If there's any problem with the random drawing of a name, the dice above can be blamed, but I think it's safe to say that there seems to be a trend in the picking of a giveaway winner.

Some comments on the feedback, first:
Jonathan - I haven't actually used eBay to sell any of my painted figures yet, but I figger I should probably just bite the bullet. There's space for a link to an "Auctions" section on the Painting by Tinweasel site proper, and that should be seeing some use fairly soonish. The suggestion to self-promote via signature on Forums I visit is a good one, too, and while I've had my painting website in all my Forum signatures for some time, I guess it never occurred to me to specifically mention my availability for commission painting.

Warhammer39999 - Thanks for the appreciation and ongoing readership! As to my commission prices, I've tried to be pretty fair and did some "price shopping" of other sites to establish ballpark commissioned figure painting rates. Thanks for the compliment on the quality of my work, but I'm really just a small fish in a very big pond. I also think I'm in somewhat of a niche market because while my painting has gotten recognition for competition-quality figures I've done, I don't think I am by any stretch a "big name" in the business and I much prefer doing "higher end" painting as it's mostly the painting aspect of the hobby I enjoy. I also kept that in mind when figuring out rates, so as to try and take time and materials into account, outside of anything special needed for individual contracts.

Faith and Fury - Funny you should mention posting more painting tutorials - I've got a few I've been putting together and they'll be getting added to the site. Keep checking back! (Thanks for the compliments, as well, and I'd definitely like to see someone else's take on Word Bearers. Color scheme-wise, their rich color is one of my favorites out of the old Chaos Legions.)

Mike - Excellent article link, thanks! At this point I really don't have to worry about a backlog and I'd ideally like to make enough to cover the cost of the stuff I buy ("reinvesting," as it were). If I were to actually turn an actual "profit" at this painting thing cost/hour-wise, I'd be amazingly surprised and my wife would be exceedingly pleased. Here's hoping...

woroxon - An odd thing about my competition pieces, is that whenever I've posted pictures of them places, the net response seems to be "meh." I don't know if it's a case of them being much more visually impressive (to judges, anyways) in person, or if it's something I need to fine-tune in my photography. That being said, I've done a bit of random sampling recently and there are some tweaks I can make to my miniature photography and there's quite a few for which I don't have images posted. Now that I've theoretically got a bit more time on my hands, though, expect to see more and better!

Faolain - Excellent suggestions on focusing on new releases. It just so happens I've always been a fan of Tyranids, moreso since I've recently gotten the newest Codex, and the first mini I painted up coming back to the hobby was a Blood Angel. Coincidentally enough, I have two untouched Space Hulk boxed sets (one still in the shrink-wrapping) and an airbrush I'm trying to come to grips with - hrm...

 As to the painting to an "army" standard, I'm open to that and the way I worded the Commission advertisement page of my painting site hopefully is clear enough that I'd do that sort of thing if someone wanted me to (and obviously at a lesser rate than a "Golden Demon"-standard figure) - I just enjoy challenging myself in painting moreso than what I think a "basecoat, shade, and highlight" standard would offer. Open to anything, though, and trying to get my own 40K army together, so I'm definitely going to have to cut a few corners if I want to have it finished before the decade's out.

doom_of_the_people - Excellent suggestion to use my site as a self-motivating tool. I tried that with my "Army Challenge" posts last month, and while I didn't get anything in the way of feedback and it wasn't my ideal output, I did end up with a playable force at the end of a day's assembly, albeit a smallish one and with a few proxies. People apparently were following the topic and I found myself a lot more focused with a deadline, so I'll probably be repeating things in future. You'll note I tend to enjoy work-in-progress updates - I'll just have to up the ante a bit in future! I do enjoy painting for competitions, too, especially over at the RelicNews Tabletop Painting & Modeling Forum - (maybe one day I'll finish in the top 3!) Maybe I work better under pressure? I guess we'll find out soon enough, eh?


 Now that that's out of the way, I think I can cut to the chase with a clear conscience. The winner of the first-ever Painting by Tinweasel Giveaway Contest is doom_of_the_people! Congratulations! Now we just have to sort out the particulars, and then I can get down to business painting up the single figure of doom_of_the_people's choice. Stay tuned!

3/04/2010

Only one more day for the Giveaway Contest!

The giveaway contest I'm offering here ends tomorrow at midnight US EST, and so far it's a fairly small number of people entered. I've dug out my old roleplaying dice collection (multi-faceted portable random chance generators?) from 20-odd years ago and am just itching to try out a d8, d10, or better yet - a d20! Just putting out a friendly reminder, for anyone who might be interested in winning!

You can reference the original post here with all the particulars in order to qualify for the giveaway: A Giveaway! But there's a catch...

3/01/2010

A Giveaway! But there's a catch...

 I'm not exactly sure how this will pan out, but it's an effort I'm willing to try for the sake of staving off inactivity and boredom, and hopefully breaking the run of bad luck myself and my family have had that's been going on for some time now. (I could go into details, as this past week has been especially trying and emotional, but that's only if anyone is really interested.)

 The long and the short of it is that I'm unemployed again following the end of a contract position of several months and for the sake of staying busy, have been trying to paint figures and drum up business for commission work. The down side is that nobody's been inquiring and there's been a lot of stuff going on life-wise that's making me lose focus of things I ought to be taking care of - I thrive best with a routine, and right now I don't have one. Driving home in the car this morning, I figgered I could kill several birds with one stone: I'll try to hold a little random drawing giveaway thingy for Followers of my site with a prize of a figure painted by me, get some feedback from readers and casual passers-by, draw attention to the fact that I do actually offer my painting services for hire, and keep me busy during the long days while my wife is at work and the kids are at school and daycare.

The Rules:
  1. The time period for entering starts when you read this update and ends at midnight, US Eastern Standard Time, on Friday, March 5th, 2010.
  2. You must be a Follower of my blog, either existing or new - hey, the more the merrier!
  3. You must leave some sort of useful comment. By "useful," I mean either a suggestion as to improving my painting as viewable through older posts here or by way of figures that have made their way into my painting site's Gallery; some advice or tip I could use to improve my painting blog/website overall; some idea to try and help me speed up the seemingly laborious process of trying to assemble and convert figures for my Chaos Space Marine army; suggestions as to topics for future Hobby Tips; or even a cheerful comment to help brighten my day.
  4. After the entry period ends at midnight on March 5th, I will randomly pick a Follower who has made a "useful" comment and that lucky soul will get essentially what amounts to a free painting commission out of me on a Single Figure of their choice per the Commission guidelines on my painting website. I don't care what brand, I don't care what style, I don't care if it's a new technique, I don't even really care what color - my "painting toolbox" is very deep, as it were.
  5. (Out of consideration for me being unemployed, just trying to liven up things, and trying to turn my luck around, the winner will need to pay shipping and/or purchase costs of the figure in question for me to both A) get my hands on something to paint, and B) get that painted something in the hands of the winner of this thing. Again, the Commission guidelines on my painting website should clarify most details - except the painting of the winner's figure is FREE!!1!)
  6. Um, the specifications for the figure, intended paint scheme, and "periodic progress updates" will be posted publicly, so all the non-winners get to share in the fun. (I'm also inclined to take suggestions on the theoretical work-in-progress, too, as I'm always trying to improve my skills BUT the final say as to the figure's appearance is between me and the random winner - Sorry!)
  7. I'm thinking I'll have to leave conversions out of this giveaway as well, as that that would open a whole other can of worms and increase the working time on the figure. That being said: gap-filling, pinning, posing of original parts, and everything else is still on the table.
 I'm really intending this as a good faith offer to occupy my mind and cheer myself up and I hope that Followers, regular Feed readers, and the hypothetical winner will view it as such and not try to "pull one over on me." I don't even care if someone wants something painted to a basic standard, it's more the spirit of the thing - I've won several trophies at GW Golden Demon competitions and can "probably paint to a higher than basic standard," but other than holding a paintbrush and doing the work for free, the figure and particulars of the painting won't be up to me! I'm also not averse to trying new techniques or effects, and with this (again) being a good faith offer, I will try and render the finished figure to the winner's specifications as much as I can.

Have at it, folks! Thanks!

10/30/2009

Getting back to business!

Note: this is not an apology, it is a combination public service announcement and self-motivational tool.

 Since our daughter started 1st Grade in the beginning of September, she has been sick several times and has shared that "wealth" with the rest of the family - I've no doubt we've had our own stuff and passed some on to her, but c'est la vie. Her 7-month-old brother has caught more or less everything that she has had. At one point in the past several months, the both of them had dual ear infections at the same time. My wife (in addition to being sick w/ colds and respiratory infections several times) found out that she had an abdominal hernia, likely dating back to when we had our son in February and due to a respiratory infection for several months around the time she delivered him by C-section, had complications due to her racking cough including tearing her incision - is it any wonder her abdominal muscles didn't quite heal properly (hence the hernia)? She had surgery about 2 1/2 weeks back now, is recovering nicely, and has all her innards stuffed back in their appropriate locations - morbid bastard that I am, I was having visions of Father Nurgle's Plaguebearers with intestines dangling out (thankfully didn't come true in her case) when describing her abdominal hernia to people.

 Myself, I've had several colds and respiratory infections along with everyone else - hey, why not - and am in the process of slowly getting over what feels like an ear infection on one side and has had most of the symptoms of an ear infection, but technically "isn't" at least according to two different ENT doctors. On the neat-o side of things, I got to have a CAT scan of my head to see what's going on internally - I've never had anything like that done before, barring an X-ray of a dislocated and broken "pinkie" toe a year or so ago, but that's not quite the same thing (and besides, I kinda figgered my toe was dislocated and broken, having straightened it back in place from being bent sideways). I'm still waiting on the scan results from earlier this week, and aside from a treatable cause of my "unusual ear pain," I'm hoping they also show the hamster inside my skull still hard at work busily spinning his wheel.


 All this is not really why I'm making an entry here - no, the reason I'm making an entry is to publicly advertise my intention (now that things have hopefully started settling down a bit life-wise) to get back on track with more regular updates and such here to make this painting/modeling site worth reading. To that end, here's a few works-in-progress that ideally will be showing here in future updates:
  • The Thousand Sons Chaos Lord of Tzeentch I made an entry about several months ago is nearing completion of the conversion work, but the commissioning client seems to have vanished! Not naming names, he was working at the Games Workshop Hobby Center I generally go to, but is no longer there - I never received my usual down-payment of the final fee (never asked, in truth) because I was able to get ahold of him fairly easily to go over ideas and make sure we were on the same page so far as the conversion and painting work to be done. Well, I put work on the figure on hold and sent the client an email to find out his intentions - my only other means of contacting him. At this point there's been no response by the requested "deadline" per my email to the client and I have no other reasonable way of getting ahold of him (I think hiring a private investigator would be a bit much ). All he's out financially is the base figure and a few conversion pieces, whereas I've sunk enough time and effort into this figure at this point that I'm going to finish this Thousand Sons Chaos Lord how I envisioned him - and then ideally he will be going up for sale or possible eBay auction.
  • The Forge World Renegade Psyker I have prepped, re-based and primed will finally be getting painted - ideally in a "test" color scheme for a Renegades and Heretics force allied with my Chaos Warband (The Disciples of the Four). I don't believe I've actually mentioned this yet, but the sole reason for my "going over to the side of Chaos" was Dan Abnett's descriptions of The Shriven - an army composed of workers and military support personnel of a Forge World "gone bad" - in his Gaunt's Ghosts series novel, "First and Only."

     I picked up the first Gaunt's Ghosts Omnibus in 2007 at the Black Library section at my first-ever Games Workshop Games Day while I stood in line to talk to Mr. Abnett, who was the guest author in Chicago that year. I'll repeat here more or less what I told him when I finally got up to the front of the line where he was chatting and signing: "I'm not going to say I'm your biggest fan, because it would be a bold-faced lie. I grabbed this book more for something to read through while I waited in line to talk to you and I've never read anything else you've written before. l will say this, though: in just going through the first few chapters here, I have to say you've got a hell of a great writing style and I've found myself completely drawn in and wanting to read more. Your descriptions are excellent and I can picture everything in my head, and the characterization and dialogue are very well-written. I'm really looking forwards to reading more by you." Well, ten or so of Dan's books on my bookshelf in and a metric crap-ton of unassembled GW Chaos miniatures in the basement later, and the sentiment still stands. I started working on a force of The Shriven shortly after getting back from Games Day, had a slight change of direction following the release of the Chaos Space Marines Codex and the "fading out" of support for The Lost and the Damned, and then got completely sidetracked with other "new and shiny" stuff since then.

     Things have come full circle - the three Siege of Vraks books from Forge World have re-ignited my motivation to have a combined Renegade and Chaos Marine force, and all the ideas kicking around since July of '07 are gnawing their way out of my head in new and more simplified ways. Oh, and if anyone happens to talk to Mr. Abnett - myself and a few unwholesome-looking individuals in body armor with green rubberized industrial protective equipment sewn into their flesh would like to have a word with him and bandy some ideas about.
  • Progress on a 500+ point force of Bad Moons Orks in a "speed painted" scheme, ideally with a step-by-step painting piece or two. I blame the Assault on Black Reach set and some generous bitz-donating souls for these guys.
  • Progress on a 500+ point force of converted Necrons tainted by millenia of slumber on a Tomb World in the general vicinity near where the Eye of Terror eventually opened up. They've spent their thousands upon thousands of years of dormancy basking in ambient output from one of the largest breaches by The Warp into real space. As a result, while they aren't servants of Chaos since they essentially have no mortal souls to be corrupted, their physical forms for the most part just "aren't quite right" due to the transmuting effects of Warp energy on material objects.

     After a "failed first attempt" at painting a Tau army to tabletop standards (I only ever finished a squad's worth - but they did get published on the Games Workshop US website as Honorable Mentions from the 2007 Chicago Golden Demons, so that's consolation) and abandonment of a plain ol' Ultramarines starter force from the Battle for Macragge set (blame Dan Abnett, as mentioned above), I set my sights on painting up some Necrons just for the sake of playing the game (hey, Necrons are easy to paint, right?) I even took shortcuts to speed things along (using spray paint as a base coat color, washes for shading, and simple edge highlights), but then my imagination kicked in after the first 3-4 Warriors and they started not to look so... regimented any more.
  • A number of single-figure display-quality figures that right now are sitting lonely in boxes and blister packs near my painting desk in our basement.
  • Heck, maybe even some of the several hundred old school Grenadier and Ral Partha figures that have been stowed away in drawers and boxes since I took a break from (or got sidetracked from) miniature painting when I first went away to college almost 17 years ago now.
So far as tentative planning goes, I'd say that's a fairly healthy list thus far. What do you guys think?

9/16/2009

Hobby Tip - Using Guide Templates

 Pardon the personal info, I suppose, if you're strictly just following along for hobby-related stuff - you can skip past the block of my rambling here to the next section.

 Just for the sake of noting it; this has been one of those weeks. Our 5-year-old daughter came down with an unrelenting hacking cough/cold/ear infection/103° fever combo which jumped off on Saturday and has continued on its merry way since then, with the exception of the fever breaking, thus allowing her to enjoy the remainder of her second week of school ever starting today. I feel bad for her being sick, but at the same time her personality and behavior took a complete turn-about from her usual pleasant self and roughly about that time dad apparently joined the Infernal Hierarchy so far as she was concerned, and every suggestion, request, or glance from me was met with immense disdain if not full-blown tantrum - and guess who the stay-at-home parent is? Today our 7-month-old son seemed completely off, hardly ate, and alternated between screaming and looking extremely tired/fitfully sleeping all day - he's also generally a pleasant baby and mostly predictable other than teeth, but he's also apparently got a helluva set of lungs. The long and the short of this all being: not a lot of sleep and not much done related to miniature painting or modeling all week. On the positive side: my wife and I saw the movie 9 at the theater and it was an excellent film, I got a call from an agency offering placement in a contingent position (which is nice, since I've been unemployed since February) although I still need to meet with them, and my unemployment benefits were to run out next week - but I apparently qualify for an extension, so while income isn't as good as it could be in our household, at least we'll continue to maintain the status quo as I try to find something manageable. (There are aspects of being an unplanned stay-at-home-parent which are nice, but I gotta confess I'd much rather have regular, stable employment and a bit more predictability - I've been employed more or less continuously since I was 14, and it's been a helluva adjustment, not the least of which being that our son was born the week after I lost my job.)


 I'm essentially still working on the conversion portion of a commissioned Chaos Lord for a Games Workshop 40K Thousand Sons army, and while I've been making progress in fits and starts and keep plugging along, I don't feel I've made enough in any one particular area to post pictures of "finished" sections. I'm essentially building a brand new head with a Thousand Sons-styled "headdress" for him, however, and figured out a useful trick in terms of trimming sheet styrene of a set thickness to a specific even width - the part of the head I'm working on is the outer trim of the headdress containing the ribbed panelling, which means I'm nearing the finish line on one of the trickiest aspects thus far.

 If you happen to find yourself needing lengths of sheet styrene to a specific width (and where it's impractical/unavailable to buy pre-cut sheet styrene), today's tip might come in handy. Hopefully anyone who's worked with sheet styrene (AKA plasticard) is familiar with scoring the stuff with a hobby knife or something similar to get a clean break of the styrene to a desired shape - well, I've been doing that for the most part but I'm finding myself needing to trim down a vaguely even 3mm wide length of 1mm thick styrene into an even 2mm wide strip (or thereabouts). The length of styrene is just a little too narrow to get an outright even break along a deeply scored line, and in trying to separate the excess off with needle-nosed hobby pliers, it more or less tore along the scored line - but with rather rough edges along the sections where the styrene was not pre-scored. Ideally I want it the correct width before I glue it in place on the figure, so I only have to worry about cutting the various lengths I need.

 That's where I hit on the idea of simply drawing out on a piece of paper the correct width and shape length of styrene I need smoothed out and to the correct measurements - a guide template or "cutting guide" of sorts, like I would use if this were a larger piece of wood I were shaping with a router or band saw, only one that I can set the strip of styrene onto on my cutting mat. This is the tricky part, since as I said, it's more or less already the correct width along the length of the strip - well beyond the point of drawing the areas that need to be trimmed off onto the piece itself and then cutting along the outline, since most of the unwanted excess is gone and I'm now just trying to tidy things up to a specific width.

A hopefully self-explanatory picture:
Cutting Styrene Tip

 What simply needs to be done past the point in the picture is to shave or cut the styrene length back to where I can see the pencil lead again, which should be fairly easy since I have a visual reference of my 2mm target width to aim towards. There's a number of advantages to this: it's on a cutting mat where I can get leverage; I don't have to hold the narrow length with needle-nosed pliers or a vise and using some other method to shape the styrene length where the edges won't be as "crisp"; and I don't have to "eyeball" the correct width at all since it's right there in front of me (unlike if I used a Dremel-mounted sanding disc, needle files, or sandpaper outright).

Questions? Comments? I'm thinking this technique ought to be applicable to tidying up custom-cut shapes as well that for one reason or another can't be cut out precisely (such as an outline drawn on the styrene itself) - an awkward-shaped addition of extremely thin sheet styrene to the face place of the Chaos Lord's helmet comes to mind, for example.

8/29/2009

Commissioned Tzeentch Chaos Lord WIP #2

 Well, now that I've got some things squared away with the figure, I can post some pictures. The first thing (and main picture) is that I've got him stripped down to his bare minimum, more or less, and everything from here out will be building him back up - you know, kinda like Steve Austin?
Tzeentch Chaos Lord WIP #2

 There was an accident of sorts with this guy - I don't know how many people are necessarily familiar with the model (since looking for reference pics online, he doesn't seem to be all that "popular"). Essentially, he's attached to the tab at the bottom by his chain and a replica "spiked backpack skull top," meaning the only thing keeping him stuck in a slottabase and upright is about the width of the slottabase tab - not even, actually. In transit or movement or maybe just my absent-minded ignorance, he must've been getting bent back and forth to weaken the join with the tab, because when I went to "unglue" him from the base with some acetone he simply sheared off at the tab.

 I had a chance to talk with the customer about this and my potential plans as to how to resolve it (various methods of pinning, pretty much) and clarified some things so far as the conversion, so with the figure stripped down at this point, I'm basically good to go.

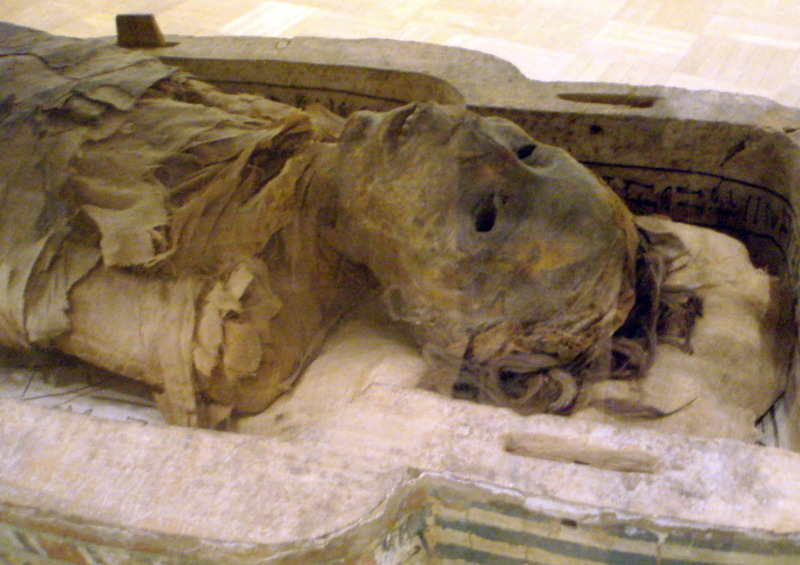
Oh, and the color scheme is more or less decided:
Tutankhamun_MainPicture.jpg
Tut_coffinette.jpg
falcon_03.jpg
800px-AncientEgyptianMummy-Antjau-CloseUp.png


 I'll post more later, but right now I'm headed up to the hospital ER with my wife to get a CAT scan of her gastrointestinal system - she's been getting violently ill any time she eats anything substantial. The kids are at my parents, the animals all have food and water, and I'm geared up for a lengthy wait...

 I've not been able to find any myself, but does anyone know of any examples of the Chaos Raptor Lord figure pinned to scenery or anything - something other than based with the chained skull, in other words?

8/21/2009

Working on a Tzeentch Chaos Lord Commission

 I recently started working on a commission for a Tzeentch Chaos Lord figure for a Thousand Sons army, and figured since I haven't really posted much in the way of work-in-progress entries here on Painting by Tinweasel, I'd start things off on this guy with as bare-bones as it gets - more or less what the customer handed over after discussion of the "tentative" final version. No pre-cast resin bases (from a near-to-opening online business elsewhere), no dramatic poses (necessarily), and no diorama-style basing - just a suitable tabletop army leader painted (and converted, even, as things have worked out) to a display quality. I've also never had the opportunity to paint any of the old "official" Chaos Marine Legions, and the Thousand Sons definitely have character in abundance.

The rough design: essentially what the customer gave me at the start:

Tzeentch Chaos Lord WIP #1
 What the customer is looking for is a Tzeentch-allied Chaos Lord w/ wings and a Daemon Weapon to lead his pure 'Sons army. The swapped-out pieces are to represent his Daemon Weapon meshed with one arm and a mutated close combat weapon on the other - I'll be making some adjustments to both arms to tie things together, and my suggestions seem to have been well-received. We likewise both agreed that an improvement on the current standard Thousand Sons Rubric Marine head would be good, with the understanding that the whole figure still fits the Thousand Sons theme - we discussed options, and I've got the go-ahead to model something I have in mind that ought to fit the bill nicely. I also suggested that the current figure is apparently lacking some sort of ranged weapon in terms of "what you see is what you get" and that with some additional conversion and sculpting that would tie together with the current planned appearance, he could be plainly and obviously game legal while allowing me to do a little additional sculpting. Other than the agreed-upon requirements, the customer has more or less given me free rein otherwise, so I'm going to get creative with this guy (within reason, of course).

 The agreed-on color scheme should look like a darker version of the standard Games Workshop Thousand Sons Legion colors, while using analogous and complementary shades for the additional parts. I'd like to try some new effects with zenithal/ambient lighting, given the figure's posing, and am really looking forwards to the planned sculpting and additions to the base model. I've not had a chance to paint any Thousand Sons troops yet (nor Raptors, for that matter), but I'm really looking forwards to working on this. (Did I mention that other than the agreed-upon requirements, I've more or less got free rein from the customer to work on this guy with whatever comes to mind and fits with the overall theme? Yee-haw!)

7/25/2009

Commissioned Work

 At this time, I am currently available to accept painting and/or conversion commissions on figures. Ideally, I primarily wish to focus on single models, but would be open to negotiation on a small-scale group/unit or figure display, depending on customer request. For any conversion work to be done, I would appreciate if any expected necessary parts were supplied in advance and with at least minimal preparation work done on them (trimming, filing, mold line removal, etc.) since, to be blunt, this is generally what takes me the longest time to accomplish since I am used to preparing figures for competition or display quality. Due to time constraints, I would not personally be willing to scratch-build display bases and the like for customers, but would be willing to paint a pre-made display base or something similar in addition to commissioned figures - again, that would be open to negotiation depending on specific customer needs. Likewise, due to time constraints, I would not be personally willing to do wholesale sculpting or scratch-building on conversion pieces, but would be agreeable to some modification to existing parts or "bitz" by negotiation depending on specific customer needs.

 If you would like to commission painting or conversion work from myself or simply wish more information, please contact me through the following link with a request, and I will get back to you as soon as I can: Commission Request from Painting by Tinweasel. I have email filtering set fairly high to limit spam, so unless the Subject Line of email correspondence is fairly specific, it may possibly be overlooked.

What to Expect:

 Unless otherwise requested, I attempt to paint every figure to my highest ability - I enjoy the process of painting and get great satisfaction from seeing a solid, finished work at the end. The same standards of quality I try to put into my own painted display figures, I will likewise apply to commissioned works. When contacting me regarding a request for commission, please include as many specifics as possible of what you would like: which figure(s) you would like painted, whether they will be supplied or purchased by myself, overall color scheme, appearance, weathering effects, basing style, links to reference material, etc. When the work to be done has been agreed upon, and overall cost for commission decided upon, I expect an initial down-payment of at least 25% of the quoted final price in addition to the cost of any extra purchases needed for the commissioned figure(s) prior to starting work.

 Ideally, all details of the work to be done will be agreed upon prior to commencement of the commission. If desired, I can provide periodic updates as the work is completed and/or in-progress pictures during the process. Regardless, I will take pictures when work is done and will send an email with pictures of your commissioned figure(s) - I expect a reply with an approval or request for any final adjustments in return. I am open to requests for minor alterations or touch-up work before approval of the figure and acceptance of the final payment, but am not willing to engage in wholesale adjustment to the commissioned figure(s) once initial details of the work to be done have been agreed upon. (Ideally, the finished figure(s) will look like what was initially agreed upon, so any drastic change in appearance, pose, color scheme or painting style shouldn't even crop up!) All finished painted figures will receive at least two coats of protective sealant and be carefully packaged to protect them during shipping.

 I reserve the right to photograph any commissioned works for display or advertisement purposes for my painting and conversion services. I take pride in my work with fine-scale miniatures, with time and effort put into each piece; as such, I would like to showcase it! If for any reason you are unable to pay for a completed commission, the figure(s) will be held for 30 days. If payment has still not been received at that time, I will then make the figure(s) available for sale to another customer or through eBay. Also note that extra parts from model/figure sets that I purchase for a commissioned work are not returned except on request.

Pricing:
Figure TypePrice Range
Single Figures (Games Workshop, Reaper, Privateer Press characters/smaller Warjacks, etc.)$40.00 - $70.00 US
Mounted Figures (Figures on horseback, motorcycles, eagles, etc.)$70.00 - $90.00 US
Large Figures (Dreadnoughts, Heavy Warjacks, trolls, Ogres, etc.)$60.00 - $90.00 US
Large Vehicles (Catapults w/ crew, tanks, Land Raiders, etc.)$80.00 - $110.00 US
Huge Models (Giants, dragons, involved pieces with large display bases, etc.)$100.00 - $130.00 US
Single Figure Units (Games Workshop, Reaper, Privateer Press, etc.)Negotiable


 This price list is posted as a general guideline and is specifically intended to be open-ended - the finalized price following discussion of the work to be done may include such variables as amount of conversion or reposing, freehand paint work, decorative basing, number of figures in a commission, unusual painting methods, etc.

Shipping:

 Figures will be shipped via U.S. Postal Service Priority Mail, unless discussed otherwise on a case by case basis (International Shipping, additional insurance, etc.) and USPS Priority Mail rates may be found here: U.S. Postal Service Domestic & International Shipping Rates

 All figures are wrapped individually and separately from packing material - care will be taken to ensure that painted and/or converted figures do not shift or move in transit to minimize possible damage, and arrive with the commissioned work ideally intact.

Payment:

 I accept Pay Pal for ease of use, insurability, and tracking purposes in case of difficulties that may crop up. Following a discussion of work to be done, expectations, materials and the like, I expect an initial down-payment of 25% of the finalized quoted price up front before work is started, plus cost of any additional supplies (miniatures, decorative materials, basing supplies, and so forth). Since my own time is limited I ask for a down-payment primarily to cover cost of my own materials and start-up supplies if needed, and to ensure the "earnestness" of commission painting requests, in a manner of speaking. I'm hoping that this doesn't come across as offensive or unreasonable, but to be blunt I would rather be working on a figure for someone who genuinely wants my services and is willing to pay for a quality finished piece done to a high standard, than spending time and resources on someone who is simply "window shopping." On the other hand, I can certainly understand concerns someone may have about commissioning my services and from that standpoint would gladly answer any additional questions or perhaps complete an initial piece with subsequent commissions to follow after there's an actual example of my work in-hand.

 The remaining payment of 75% plus shipping costs will come due upon final completion of all work, and is expected prior to actual shipment of the finished miniature(s).

LinkWithin

Related Posts with Thumbnails

Followers: