Showing posts with label texture. Show all posts

8/10/2010

Hobby Tip - "Making" Basing Material, Pt. 3

 Here's the figure with extra basing material added - at this point the join between the resin casting and the slottabase is seamless, where previously there were gaps. The texture itself is a match for to-scale dirt/rough ground, and provides a good contrast with the existing open areas of broken concrete that were on the original resin pre-cast base top.

 So far as any rough areas around the slottabase where there were inadvertent extra patches of texture from all the poking and prodding into final position, if you want a smooth finish to the sides of your bases (which I generally do, just for appearance's sake), then a quick touch up with an emery board or finishing stick (800+ grit wet-dry sandpaper would be a quick substitute) around the perimeter is all that's needed.

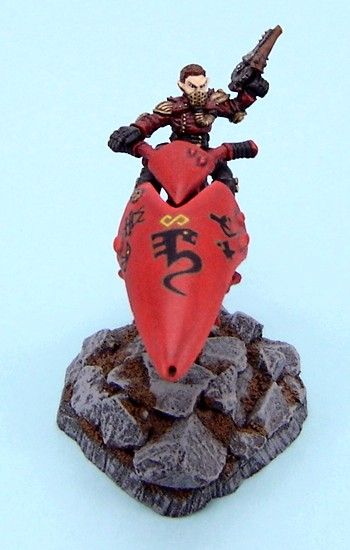
 Here are some examples of the basing material used on figures, both the fine grit "ant dirt" and the to-scale rocks and gravel. Some of these painted figures are newer and some are (literally) almost 20 years old. (See if you can guess which are which - hee hee!):

 Outside of the converted Secret Weapon Miniatures base and GW slotta beneath the figure, larger chunks of broken resin, a GW Rhino vehicle roof hatch door, the remainder of the base was textured with "ant dirt" glued to an underlying structure of cotton batting.


 This Infinity figure is mounted on a converted Secret Weapon Miniatures base (and Infinity slotta) with "ant dirt" added as texture and gap-filling in much the same way as the example throughout the rest of the tutorial.


 The base is essentially made of a cut wood block, small decorative driveway stones, and "ant dirt."


 The figure base is made from a piece of cork notice board glued to a GW slottabase, a metal bracket from the frame of the cork notice board, and a few paperclip ends stuck into the cork. The rest was textured with both fine grit "ant dirt" and small rocks mixed.

[Edit] I'll add the finished figure and base used as an example in the rest of the tutorial to the photo group when it's finished in a day or so. [/Edit]

 You can find the first part of this Hobby Tip here: Hobby Tip - "Making" Basing Material, Pt. 1

8/05/2010

Hobby Tip - "Making" Basing Material, Pt. 2

 Here we have the application of the texture to the figure's base. He's mounted on a converted resin pre-cast base from Secret Weapon Miniatures' original Urban Streets line and I opted not to cover up any of the broken concrete details with larger to-scale rocks and gravel. In this picture, I'm essentially applying the separated fine grit with a synthetic brush (don't want natural bristles to absorb my adhesive liquid!) in the areas where I want to blend the trimmed-off resin top with the default GW slottabase the figure came with. I've also worked in some texture around the figure's feet to have them blend in properly and look natural, as well as putting a little bit of added gritty texture here and there on the top of the base just for appearance's sake.

 The liquid I'm using is watered-down Future Floor Finish. I prefer this for applying texture to bases because it lets me play around with the positioning for a longer time than what glue does, but still dries to a rock-hard finish. My mixture is more or less 1:1, but I also added some flow improver to make sure that it seeps into all the crevices in the basing material that I'm brushing on. A good alternative is watered-down PVA glue, which I would otherwise use if not for the very fine texture of the "ant dirt" - your mileage may vary.

 If I were using any added fine scale rocks and gravel on the figure's base, what I'd probably do is set those down first using CA glue and a pair of fine tweezers for positioning, and then blend in the edges once dry with some additional brushed-on basing material around them - it really depends on the appearance you're after, and in this case I want to play up the cracked concrete underneath the feet of the Chaos Lord.

 If you're wanting to use the finer grit of "ant dirt" strictly as texture material, for rust or dust effects on base debris, say, then I would suggest likewise applying the fine grit after you're assembled and put everything else down on your base - you get maximum "realism" that way and can push and prod the soaked texture material into crevices and depressions where things like rust and dust would naturally settle. (Again, I prefer thinned-down Future Floor Finish over PVA glue just because of the longer drying time that allows me to keep moving the basing material around with a brush until I'm satisfied with the appearance.)

 You can find the third part of this Hobby Tip here: Hobby Tip - "Making" Basing Material, Pt. 3

8/03/2010

Hobby Tip - "Making" Basing Material, Pt. 1

 I may have referenced this before in past posting of my work and such, but there's really only a very few materials I use for basing my figures - one reason being is that that the materials I use are generally inexpensive, and another is that the stuff I use covers a lot of (ahem) ground in terms of potential flexibility in appearance for basing figures. Here we have the collected contents of several large ant mounds, mostly separated out - a material I like to call "ant dirt."

 The above picture is the first step in the process of "making" custom basing material - or texture material, if you prefer that name. It might actually be the second step or so, but I don't think the prior processes (read: me scraping up ant mounds from the gaps in my driveway and picking out bits of vegetation) rate a picture. What you see on the paper plate in the image is a loose pile of collected dirt and gravel from an ant mound.

 Using the mesh sifter in the above picture, I essentially folded the paper plate into a "funnel" of sorts and sifted the dirt and gravel through the mesh. I found the best results were to pour a thin stream of the dirt and gravel from the plate down through the angled sides of the sifter, which generally allowed the finer grit to pour right through and shifted the larger pieces towards the middle. Keeping the mesh over the larger container and lightly shaking, I finished separating out all the fine grit; I can later use it for a variety of effects - rust texture, moss, fine grit, loose rubble/sand, and 28mm scale dirt. What ended up left in the mesh filter were the larger (reasonably speaking) rocks and gravel, which I dumped into a separate container for later use as, well... fine scale rocks and gravel.

 You can find the second part of this Hobby Tip here: Hobby Tip - "Making" Basing Material, Pt. 2

LinkWithin

Related Posts with Thumbnails

Followers: