Showing posts with label sculpting. Show all posts

3/17/2015

#hobbytiptuesday - Working with Epoxy Putty

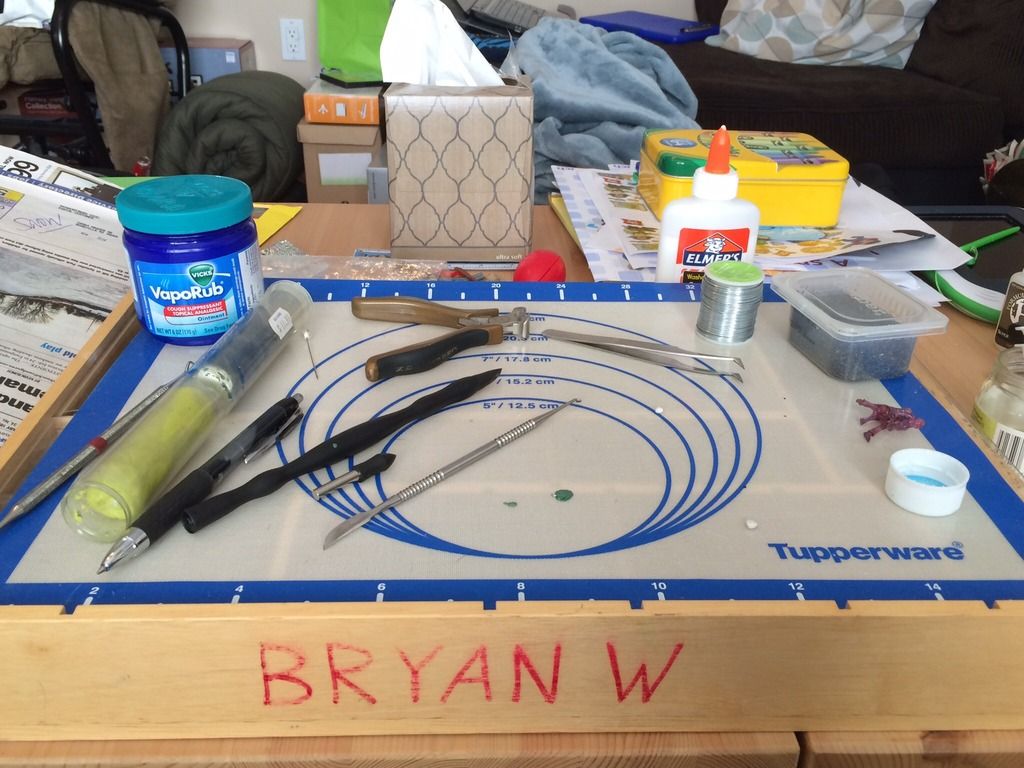
 I had posted this picture on my Painting by Tinweasel Facebook page and a teaser that I would be putting up something about it for a hobby tip - didn't quite get to it then, so making up for lost time now.

 
  So I've got a couple of things going on in this picture related to epoxy putty sculpting. The main one I want to mention is the Tupperware baking sheet to sculpt on - this thing is great! It's made of silicone and for me is essentially a flat non-stick sheet to work from when sculpting. It rolls up for convenience, is non-stick to two-part epoxy putty and similar materials and is easy to clean off. Much easier than working on a plastic bag or lubricated sheet of styrene. It's officially called the "Tupperware Silicone Wonder Mat" and can be bought online or retail for roughly $20-25 US. (A little pricey maybe, but the use I've gotten out of this thing and the messes avoided have made it worth it.)
 
 For another, I want to point out the Vicks VapoRub. Using this was a suggestion from Joe Orteza when I attended a sculpting seminar of his at GenCon 2014: use VapoRub instead of petroleum jelly to prevent epoxy medium from sticking to sculpting tools. Not only does it work just as well as petroleum jelly to prevent epoxy sculpting putty from sticking, it either gets absorbed or eventually evaporates from sculpting material, thus preventing lubricant causing problems when applying multiple layers of sculpting putty - it was an excellent suggestion by Joe that I've been using since!
 
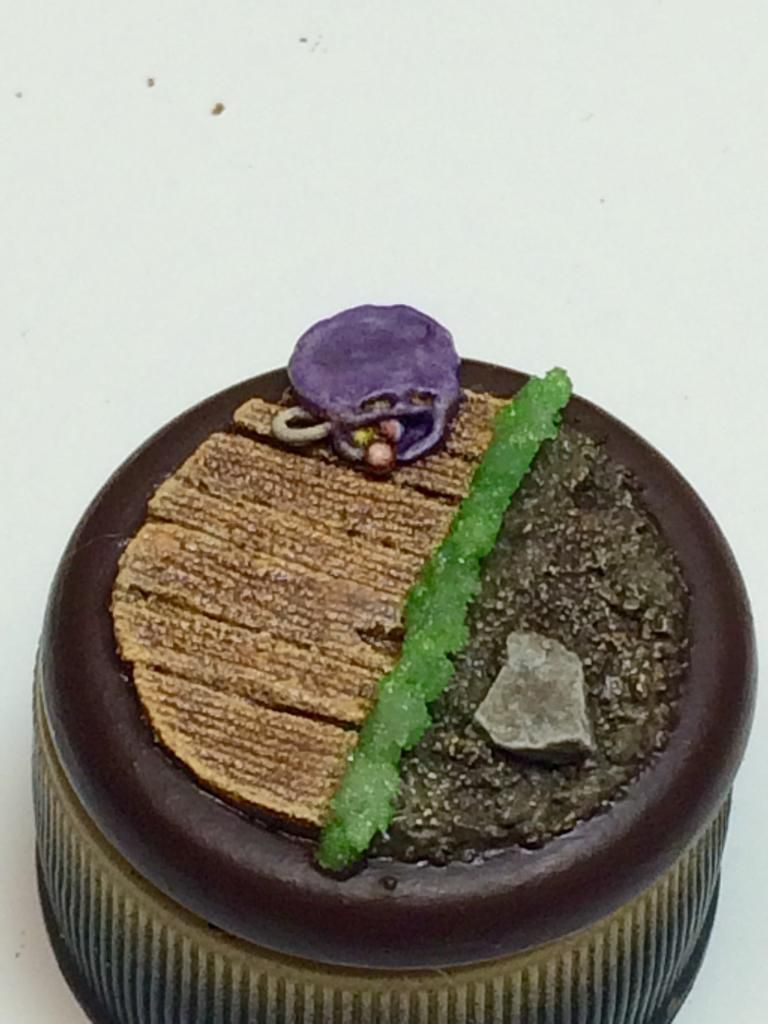
 Last, but not least, I wanted to show off a little! The green blob on the mat in the above picture is my first attempt at sculpting in a long, long time. I wanted to sculpt a marble bag for a figure's base with small plastic beads embedded in the epoxy putty for the marbles remaining in the bag. I'll have a bunch of loose ones scattered on the finished base when all's said and done. Here's how it turned out painted:


3/03/2010

Top Sekkrit Projekt for Secret Weapon

Now that I've got the bugs worked out in the process (it's been a while to get to this point, but I think I've got everything necessary hammered out for assembly-line production), I'm in the midst of designing stuff for a collaborative release between misterjustin of Secret Weapons Miniatures fame. I don't want to say too much, as he doesn't know I'm posting this (*muahahaha*), but sufficent to say my current side project ought to go perfectly with his recently-released line of Tech Factory bases.

As an aside, I've mentioned a few times now that my recent Renegade Psyker figure is mounted on one of his pre-release molds of the Urban Streets II series (except for the "psychic explosion" and the "random debris" on top, the base decoration is essentially "all his" - it hopefully goes without saying that I recommend his Secret Weapon Miniatures stuff since I was willing to use one of his "test blanks" on a "color test" display-quality figure and I'm kinda picky in how I accent (accessorize?) my painted stuff. I haven't done an "official" review of the bases, though, because the ones I've got from Secret Weapon (and am planning to use in future additions to my 40K Chaos forces) aren't technically the "official" released versions.

9/16/2009

Hobby Tip - Using Guide Templates

 Pardon the personal info, I suppose, if you're strictly just following along for hobby-related stuff - you can skip past the block of my rambling here to the next section.

 Just for the sake of noting it; this has been one of those weeks. Our 5-year-old daughter came down with an unrelenting hacking cough/cold/ear infection/103° fever combo which jumped off on Saturday and has continued on its merry way since then, with the exception of the fever breaking, thus allowing her to enjoy the remainder of her second week of school ever starting today. I feel bad for her being sick, but at the same time her personality and behavior took a complete turn-about from her usual pleasant self and roughly about that time dad apparently joined the Infernal Hierarchy so far as she was concerned, and every suggestion, request, or glance from me was met with immense disdain if not full-blown tantrum - and guess who the stay-at-home parent is? Today our 7-month-old son seemed completely off, hardly ate, and alternated between screaming and looking extremely tired/fitfully sleeping all day - he's also generally a pleasant baby and mostly predictable other than teeth, but he's also apparently got a helluva set of lungs. The long and the short of this all being: not a lot of sleep and not much done related to miniature painting or modeling all week. On the positive side: my wife and I saw the movie 9 at the theater and it was an excellent film, I got a call from an agency offering placement in a contingent position (which is nice, since I've been unemployed since February) although I still need to meet with them, and my unemployment benefits were to run out next week - but I apparently qualify for an extension, so while income isn't as good as it could be in our household, at least we'll continue to maintain the status quo as I try to find something manageable. (There are aspects of being an unplanned stay-at-home-parent which are nice, but I gotta confess I'd much rather have regular, stable employment and a bit more predictability - I've been employed more or less continuously since I was 14, and it's been a helluva adjustment, not the least of which being that our son was born the week after I lost my job.)


 I'm essentially still working on the conversion portion of a commissioned Chaos Lord for a Games Workshop 40K Thousand Sons army, and while I've been making progress in fits and starts and keep plugging along, I don't feel I've made enough in any one particular area to post pictures of "finished" sections. I'm essentially building a brand new head with a Thousand Sons-styled "headdress" for him, however, and figured out a useful trick in terms of trimming sheet styrene of a set thickness to a specific even width - the part of the head I'm working on is the outer trim of the headdress containing the ribbed panelling, which means I'm nearing the finish line on one of the trickiest aspects thus far.

 If you happen to find yourself needing lengths of sheet styrene to a specific width (and where it's impractical/unavailable to buy pre-cut sheet styrene), today's tip might come in handy. Hopefully anyone who's worked with sheet styrene (AKA plasticard) is familiar with scoring the stuff with a hobby knife or something similar to get a clean break of the styrene to a desired shape - well, I've been doing that for the most part but I'm finding myself needing to trim down a vaguely even 3mm wide length of 1mm thick styrene into an even 2mm wide strip (or thereabouts). The length of styrene is just a little too narrow to get an outright even break along a deeply scored line, and in trying to separate the excess off with needle-nosed hobby pliers, it more or less tore along the scored line - but with rather rough edges along the sections where the styrene was not pre-scored. Ideally I want it the correct width before I glue it in place on the figure, so I only have to worry about cutting the various lengths I need.

 That's where I hit on the idea of simply drawing out on a piece of paper the correct width and shape length of styrene I need smoothed out and to the correct measurements - a guide template or "cutting guide" of sorts, like I would use if this were a larger piece of wood I were shaping with a router or band saw, only one that I can set the strip of styrene onto on my cutting mat. This is the tricky part, since as I said, it's more or less already the correct width along the length of the strip - well beyond the point of drawing the areas that need to be trimmed off onto the piece itself and then cutting along the outline, since most of the unwanted excess is gone and I'm now just trying to tidy things up to a specific width.

A hopefully self-explanatory picture:
Cutting Styrene Tip

 What simply needs to be done past the point in the picture is to shave or cut the styrene length back to where I can see the pencil lead again, which should be fairly easy since I have a visual reference of my 2mm target width to aim towards. There's a number of advantages to this: it's on a cutting mat where I can get leverage; I don't have to hold the narrow length with needle-nosed pliers or a vise and using some other method to shape the styrene length where the edges won't be as "crisp"; and I don't have to "eyeball" the correct width at all since it's right there in front of me (unlike if I used a Dremel-mounted sanding disc, needle files, or sandpaper outright).

Questions? Comments? I'm thinking this technique ought to be applicable to tidying up custom-cut shapes as well that for one reason or another can't be cut out precisely (such as an outline drawn on the styrene itself) - an awkward-shaped addition of extremely thin sheet styrene to the face place of the Chaos Lord's helmet comes to mind, for example.

9/08/2009

#hobbytiptuesday - Making Sharpened Teeth

 Note: for simplicity's sake, I'm simply going to use reference "teeth" throughout this Hobby Tip writeup, but the technique is applicable for just about anything on a figure that one would want as a length of pointed object: sharp teeth, spines, spikes, claws, studs, spurs, and all the way up to tusks and the like with thicker lengths of styrene. I've been using this method for a while and found it useful in shaping a wide variety of add-on details with my miniatures.

 I would imagine a lot of people sculpt pointed teeth, spikes, etc. from the same material with which they are doing customization or additional sculpting onto a figure. Personally, I prefer to make sharp teeth and similar details out of length of styrene rod, which I can buy in a variety of pre-sized diameters and grind to shape. I find it gives me a bit more freedom to sculpt details on a figure, drill in holes for the "sharp bits" afterward, and then (if necessary) sculpt gums or additional flesh around the solid styrene. I also find that by making teeth out of a firmer material beforehand, it allows me to make adjustments directly to the teeth as the project goes along, if need be, before putting them in their "final" position. Personal opinion again, but I figger that added details sculpted around the teeth respond more dynamically to having them there as an existing hard physical object what I than I feel I'd get if I were trying to do them as a part of the overall process with a medium like Green Stuff or Milliput - to each their own, though.


Here are the materials I generally use in making teeth to add to figures:
Making Teeth Image 1
 Lengths of styrene rod, available in many hobby stores or through suppliers of Evergreen and Plastruct products; sandpaper - I use a 120 "medium" grit here, although that's a matter of personal preference from trial and error; Tenax 7-R Plastic Welder - couldn't recommend this stuff more highly for a variety of uses with plastic miniatures and bitz; a sharp hobby knife of some type; and alternatively, a Dremel or other high speed rotary tool with medium or coarse sanding discs - it goes a bit faster in terms of shaping a point, but is a bit sloppier due to melting of the styrene in the process (I'll focus on strictly sandpaper here in this Hobby Tip, but you can get the same results with careful quick taps of your styrene rod on a sanding disc at a low speed).

Making Teeth Image 2
 Holding the styrene rod at roughly a 45° angle to the sandpaper, you want to shape a quick point first with application of pressure slightly behind the end of the rod and short, quick drags of the rod backwards on the paper. I find that you get better results if you work near the outer edge of a piece of sandpaper on a flat surface, twisting the rod as you go with your other fingers to keep a different surface of the styrene against the paper with every burst of friction - eventually, if you keep twisting it evenly, you end up with a centered point.

Making Teeth Image 3
 Once you have your initial centered point, you move your grip slightly so as to make light, quick drags of the styrene rod backwards along more of the flat surface behind the shaped point. Again twisting as you go, you'll find that the surface of the sharpened shape begins to lengthen with repeated dragging across the paper with application of pressure further behind the initial point - in other words, you can vary the length and curve of the tooth's "pointiness" by adjusting how you grind down the remaining styrene rod behind your initial 45° angle. This particular example tooth in the picture ended up being about 3mm in length with a gradual curve to the top as I used a thicker styrene rod and drew out the "point" by sanding against the "flat" of the styrene rod.

A few steps not shown, but hopefully self-explanatory:
 After shaping the tooth to whatever curve and length desired, I generally give the tooth still attached to the end of the styrene rod a quick dip into the jar of Tenax 7-R - what the stuff normally does is liquefy plastic it comes in contact with, so you can brush it on in small doses and let capillary action and a little pressure "glue" plastic parts together seamlessly. In my case, with just a quick dip of the piece I've sanded to shape, it "firms" the whole dipped tooth up to a hard, smooth length of styrene so fine points at the end of long gradual tapers are less likely to get broken off. (Barring having a jar of Tenax 7-R handy, a similar effect could be achieved from an extra- extra-fast dip in straight acetone - acetone, however, is more likely to ruin the shape of your sanded tooth if it is left suspended in the liquid too long, and it takes a little longer for the styrene to solidify completely again as compared to using Tenax.)

 All that remains is cutting your sanded tooth off the end of your length of styrene rod. Generally I make teeth two at a time - one on each end of the rod following the same process - and then trim them both off the length of styrene, for the sake of saving some time and effort. I would also recommend leaving a little extra length of un-shaped styrene at the base of your teeth to allow for sinking an inset hole for them on your figure, or drilling in a pin in the base for purposes of mounting a home-made tusk or something a little thicker.

Here we have an assortment of finished sanded teeth ready for use:
Making Teeth Image 4

 Through experience, I've found that teeth and spikes and the like made this way prove a bit more durable if you leave a slight length behind your curved point and you mount them on your figure glued into a shallow hole from a suitably-sized fine drill bit. You can then go and shape the gums or flesh around the base of the tooth - or in the case of spiked armor, leave it as-is if you have the length of sharpened styrene rod in a hole of matching diameter.


 As always, I'd appreciate any comments or feedback and if anything is a little unclear wording-wise, I'd be more than happy to explain any part of the process in a bit more detail. (Any excuse to make another entry here, you know...)

8/29/2009

Commissioned Tzeentch Chaos Lord WIP #2

 Well, now that I've got some things squared away with the figure, I can post some pictures. The first thing (and main picture) is that I've got him stripped down to his bare minimum, more or less, and everything from here out will be building him back up - you know, kinda like Steve Austin?
Tzeentch Chaos Lord WIP #2

 There was an accident of sorts with this guy - I don't know how many people are necessarily familiar with the model (since looking for reference pics online, he doesn't seem to be all that "popular"). Essentially, he's attached to the tab at the bottom by his chain and a replica "spiked backpack skull top," meaning the only thing keeping him stuck in a slottabase and upright is about the width of the slottabase tab - not even, actually. In transit or movement or maybe just my absent-minded ignorance, he must've been getting bent back and forth to weaken the join with the tab, because when I went to "unglue" him from the base with some acetone he simply sheared off at the tab.

 I had a chance to talk with the customer about this and my potential plans as to how to resolve it (various methods of pinning, pretty much) and clarified some things so far as the conversion, so with the figure stripped down at this point, I'm basically good to go.

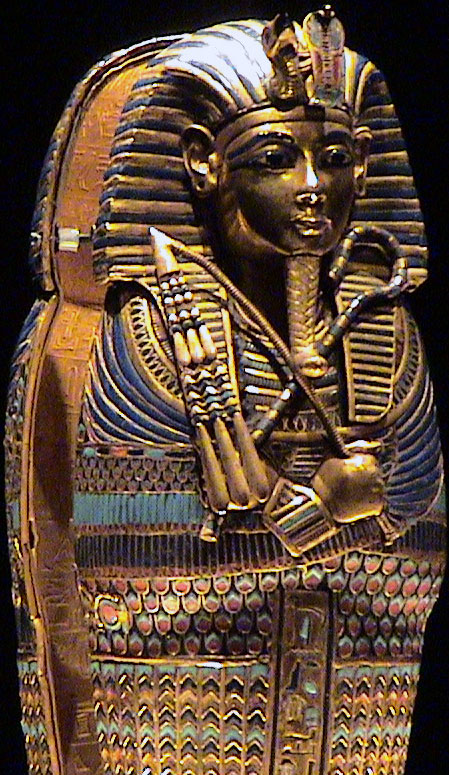
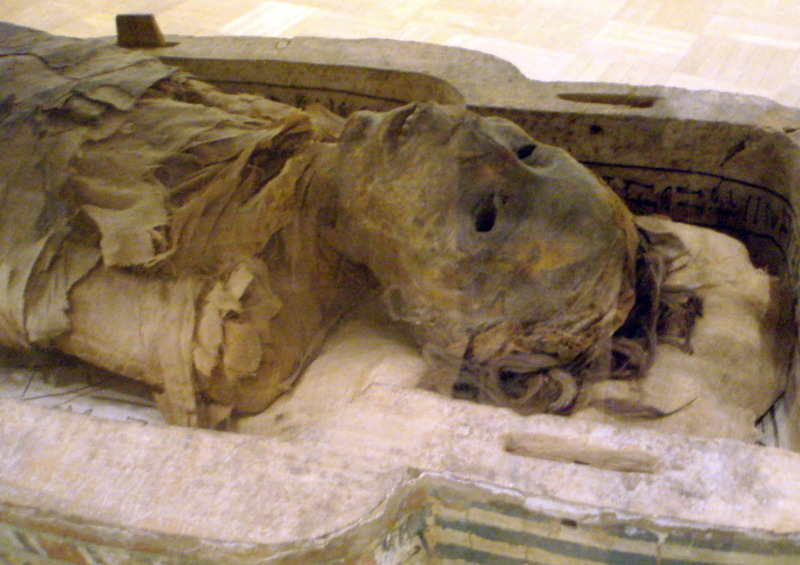
Oh, and the color scheme is more or less decided:
Tutankhamun_MainPicture.jpg
Tut_coffinette.jpg
falcon_03.jpg
800px-AncientEgyptianMummy-Antjau-CloseUp.png


 I'll post more later, but right now I'm headed up to the hospital ER with my wife to get a CAT scan of her gastrointestinal system - she's been getting violently ill any time she eats anything substantial. The kids are at my parents, the animals all have food and water, and I'm geared up for a lengthy wait...

 I've not been able to find any myself, but does anyone know of any examples of the Chaos Raptor Lord figure pinned to scenery or anything - something other than based with the chained skull, in other words?

8/21/2009

Working on a Tzeentch Chaos Lord Commission

 I recently started working on a commission for a Tzeentch Chaos Lord figure for a Thousand Sons army, and figured since I haven't really posted much in the way of work-in-progress entries here on Painting by Tinweasel, I'd start things off on this guy with as bare-bones as it gets - more or less what the customer handed over after discussion of the "tentative" final version. No pre-cast resin bases (from a near-to-opening online business elsewhere), no dramatic poses (necessarily), and no diorama-style basing - just a suitable tabletop army leader painted (and converted, even, as things have worked out) to a display quality. I've also never had the opportunity to paint any of the old "official" Chaos Marine Legions, and the Thousand Sons definitely have character in abundance.

The rough design: essentially what the customer gave me at the start:

Tzeentch Chaos Lord WIP #1
 What the customer is looking for is a Tzeentch-allied Chaos Lord w/ wings and a Daemon Weapon to lead his pure 'Sons army. The swapped-out pieces are to represent his Daemon Weapon meshed with one arm and a mutated close combat weapon on the other - I'll be making some adjustments to both arms to tie things together, and my suggestions seem to have been well-received. We likewise both agreed that an improvement on the current standard Thousand Sons Rubric Marine head would be good, with the understanding that the whole figure still fits the Thousand Sons theme - we discussed options, and I've got the go-ahead to model something I have in mind that ought to fit the bill nicely. I also suggested that the current figure is apparently lacking some sort of ranged weapon in terms of "what you see is what you get" and that with some additional conversion and sculpting that would tie together with the current planned appearance, he could be plainly and obviously game legal while allowing me to do a little additional sculpting. Other than the agreed-upon requirements, the customer has more or less given me free rein otherwise, so I'm going to get creative with this guy (within reason, of course).

 The agreed-on color scheme should look like a darker version of the standard Games Workshop Thousand Sons Legion colors, while using analogous and complementary shades for the additional parts. I'd like to try some new effects with zenithal/ambient lighting, given the figure's posing, and am really looking forwards to the planned sculpting and additions to the base model. I've not had a chance to paint any Thousand Sons troops yet (nor Raptors, for that matter), but I'm really looking forwards to working on this. (Did I mention that other than the agreed-upon requirements, I've more or less got free rein from the customer to work on this guy with whatever comes to mind and fits with the overall theme? Yee-haw!)

8/18/2009

Hobby Tip - Making Raised Details

 One way to achieve fine, raised detail on a figure (short of natural sculpting talent) is to get creative with alternative materials. Sort of like what scrapbookers do with stamps, ink, and embossing powder, a similar, raised effect can fairly easily be accomplished with a fine-grain natural desiccant, such as talc, baby powder (same thing, only scented), or corn starch (same thing, only organic- and not mineral-based) - essentially you want something like these both for their moisture absorbing properties and their fine consistency.

 Using thinned-down PVA glue and a brush, you can essentially "paint" a design, shape, or pattern onto a miniature and then sprinkle on a small, precise amount of your talc over the wet lines or shapes. The moisture in the glue will be absorbed by the powder, which will "bloat" slightly over your added design - if you do this in small amounts or over small areas, you shouldn't have to worry too much about evaporation or your glue firming up before you've finished. When completely dry, your new raised detailing will be permanently set by the glue. I've been using this process in a modified manner for building up ground cover on scenery lately, the primary difference is that I've been using materials with a larger "grain" - you could apply multiple applications of this process if you want variable heights or a final result that is noticeably raised from its base surface, but an easier method might be to use something with a slightly larger "grain" for an underlying layer and then smooth out and blend in the outer surface with thinned PVA glue and a desiccant powder. Any leftover powder will easily clean up when you wash your figure before priming, and should be set firm enough to avoid being rubbed off by a gentle rubbing/scrubbing.

 The only reason I would recommend PVA glue (or thinned Future Floor Finish, alternatively) over something like CA glue is primarily the aspect of drying time - PVA glue sets much slower - but also the ability to accurately "paint on" the design you want added to a figure. Some CA glue bottle applicator tips are small, but don't have quite the level of accuracy (or ease of quick removal if you make a mistake) as a fine brush point. If you want something quick and easy, like lined scarring or patchy, leprous skin, and aren't so concerned about precision in the manner that a unit insignia would need, then CA glue ought to likewise work excellently.

8/13/2009

Hobby Tip - Cuticle Stones

 I would highly recommend the purchase of a readily available and fairly inexpensive product for use in prepping miniatures, bases, sculpting, resin, and other decorative bits with your figures - unorthodox as it might sound, a common (and I can't believe I'm linking to this sort of site for an example) cuticle stone. They're known by lots of names, and I'm sure you can readily find one at a local pharmacy, druggist, general goods store, manicurist's shop, or salon.

 Essentially, when wet, cuticle stones work like automotive grade wet-dry sandpaper in stick form - I'd wager 600+ grit, maybe more like 800. In other words, this isn't something you'd want to use as your primary tool for filing/sanding of miniatures or scenery materials, but it does a great job at smoothing rough edges, taking things down in tricky hard-to-reach areas, and burnishing. The cuticle stone I've got is shaped like the one I linked to on the beauty supplies website (above) - essentially like a squared-off bullet, with a rectangular body that curves on two faces to a somewhat rounded not-quite-30­° angle straight end. So far, I've used it to get a baby-smooth burnished finish on the skull helm of a former white metal Khorne Lord now-Undivided after Dremeling off his "antlers"; stripping the multiple mold lines off of my somewhat soft resin Forge World Renegade Psyker without leaving score marks like a metal file would; adding scoring, gouges, and scrapes to resin basing and chunks of broken resin "concrete" using the right-angles of the rectangular body; and general purpose (but not heavy-duty) filing and smoothing. The nice thing about my cuticle stone is that it's got rounded curves, a broad angle, and 90° corner sanding all in one package.

 I'd recommend picking one up to anyone, just to see how they handle - let me know what you think.

7/25/2009

Commissioned Work

 At this time, I am currently available to accept painting and/or conversion commissions on figures. Ideally, I primarily wish to focus on single models, but would be open to negotiation on a small-scale group/unit or figure display, depending on customer request. For any conversion work to be done, I would appreciate if any expected necessary parts were supplied in advance and with at least minimal preparation work done on them (trimming, filing, mold line removal, etc.) since, to be blunt, this is generally what takes me the longest time to accomplish since I am used to preparing figures for competition or display quality. Due to time constraints, I would not personally be willing to scratch-build display bases and the like for customers, but would be willing to paint a pre-made display base or something similar in addition to commissioned figures - again, that would be open to negotiation depending on specific customer needs. Likewise, due to time constraints, I would not be personally willing to do wholesale sculpting or scratch-building on conversion pieces, but would be agreeable to some modification to existing parts or "bitz" by negotiation depending on specific customer needs.

 If you would like to commission painting or conversion work from myself or simply wish more information, please contact me through the following link with a request, and I will get back to you as soon as I can: Commission Request from Painting by Tinweasel. I have email filtering set fairly high to limit spam, so unless the Subject Line of email correspondence is fairly specific, it may possibly be overlooked.

What to Expect:

 Unless otherwise requested, I attempt to paint every figure to my highest ability - I enjoy the process of painting and get great satisfaction from seeing a solid, finished work at the end. The same standards of quality I try to put into my own painted display figures, I will likewise apply to commissioned works. When contacting me regarding a request for commission, please include as many specifics as possible of what you would like: which figure(s) you would like painted, whether they will be supplied or purchased by myself, overall color scheme, appearance, weathering effects, basing style, links to reference material, etc. When the work to be done has been agreed upon, and overall cost for commission decided upon, I expect an initial down-payment of at least 25% of the quoted final price in addition to the cost of any extra purchases needed for the commissioned figure(s) prior to starting work.

 Ideally, all details of the work to be done will be agreed upon prior to commencement of the commission. If desired, I can provide periodic updates as the work is completed and/or in-progress pictures during the process. Regardless, I will take pictures when work is done and will send an email with pictures of your commissioned figure(s) - I expect a reply with an approval or request for any final adjustments in return. I am open to requests for minor alterations or touch-up work before approval of the figure and acceptance of the final payment, but am not willing to engage in wholesale adjustment to the commissioned figure(s) once initial details of the work to be done have been agreed upon. (Ideally, the finished figure(s) will look like what was initially agreed upon, so any drastic change in appearance, pose, color scheme or painting style shouldn't even crop up!) All finished painted figures will receive at least two coats of protective sealant and be carefully packaged to protect them during shipping.

 I reserve the right to photograph any commissioned works for display or advertisement purposes for my painting and conversion services. I take pride in my work with fine-scale miniatures, with time and effort put into each piece; as such, I would like to showcase it! If for any reason you are unable to pay for a completed commission, the figure(s) will be held for 30 days. If payment has still not been received at that time, I will then make the figure(s) available for sale to another customer or through eBay. Also note that extra parts from model/figure sets that I purchase for a commissioned work are not returned except on request.

Pricing:
Figure TypePrice Range
Single Figures (Games Workshop, Reaper, Privateer Press characters/smaller Warjacks, etc.)$40.00 - $70.00 US
Mounted Figures (Figures on horseback, motorcycles, eagles, etc.)$70.00 - $90.00 US
Large Figures (Dreadnoughts, Heavy Warjacks, trolls, Ogres, etc.)$60.00 - $90.00 US
Large Vehicles (Catapults w/ crew, tanks, Land Raiders, etc.)$80.00 - $110.00 US
Huge Models (Giants, dragons, involved pieces with large display bases, etc.)$100.00 - $130.00 US
Single Figure Units (Games Workshop, Reaper, Privateer Press, etc.)Negotiable


 This price list is posted as a general guideline and is specifically intended to be open-ended - the finalized price following discussion of the work to be done may include such variables as amount of conversion or reposing, freehand paint work, decorative basing, number of figures in a commission, unusual painting methods, etc.

Shipping:

 Figures will be shipped via U.S. Postal Service Priority Mail, unless discussed otherwise on a case by case basis (International Shipping, additional insurance, etc.) and USPS Priority Mail rates may be found here: U.S. Postal Service Domestic & International Shipping Rates

 All figures are wrapped individually and separately from packing material - care will be taken to ensure that painted and/or converted figures do not shift or move in transit to minimize possible damage, and arrive with the commissioned work ideally intact.

Payment:

 I accept Pay Pal for ease of use, insurability, and tracking purposes in case of difficulties that may crop up. Following a discussion of work to be done, expectations, materials and the like, I expect an initial down-payment of 25% of the finalized quoted price up front before work is started, plus cost of any additional supplies (miniatures, decorative materials, basing supplies, and so forth). Since my own time is limited I ask for a down-payment primarily to cover cost of my own materials and start-up supplies if needed, and to ensure the "earnestness" of commission painting requests, in a manner of speaking. I'm hoping that this doesn't come across as offensive or unreasonable, but to be blunt I would rather be working on a figure for someone who genuinely wants my services and is willing to pay for a quality finished piece done to a high standard, than spending time and resources on someone who is simply "window shopping." On the other hand, I can certainly understand concerns someone may have about commissioning my services and from that standpoint would gladly answer any additional questions or perhaps complete an initial piece with subsequent commissions to follow after there's an actual example of my work in-hand.

 The remaining payment of 75% plus shipping costs will come due upon final completion of all work, and is expected prior to actual shipment of the finished miniature(s).

7/11/2009

Hobby Tip - Green Stuff Sculpting

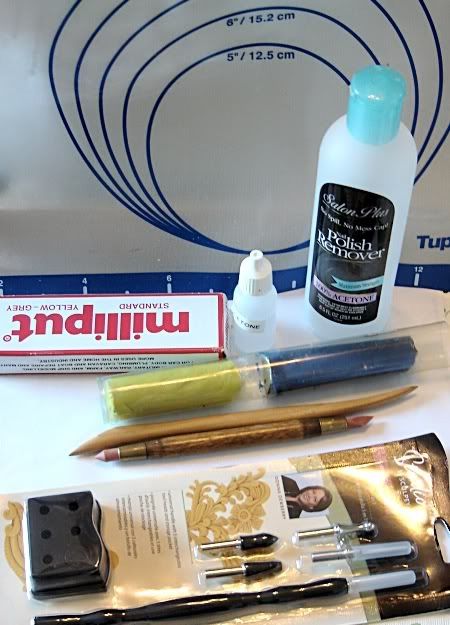
What do all these have in common?
Green Stuff tools
 Well, they all have to do with my sculpting of Green Stuff - I'm not the most veteran of sculptors, and have never sculpted a full figure from scratch, but I've used it in smaller amounts on quite a few occasions from simple gap-filling all the way up to re-sculpts of joints and fill-ins of missing (or mutated) body parts. It's been suggested that when blogging, pictures say a lot more than simple text alone (Thanks, Ron!). The long and the short of it is that Green Stuff is the nickname for yellow-and-blue Kneadatite epoxy putty. The blue part is the hardener and the yellow part is the filler: more blue in the two-part mixture will make the putty cure faster and harder, whereas using more yellow will result in a softer mixture that takes details better but sets more slowly.

 A wide range of tools can be used for sculpting and shaping Green Stuff: wax carving tools, dental tools, pins, hobby knives, and even custom-made molds. Personally, I alternate between using a wooden clay sculpting tool with a sharpened wedge-shaped end and an opposite rounded flat end - you can see it in the picture above. The excellent thing about wood is that it's great for burnishing, since it naturally has some "give" to it compared to a comparable metal sculpting tool, and if it comes right down to it you can reshape the tool itself if you need different angles or something (as I've done, myself, in increasing the sharpness of the point on the wedge-shaped end); the downside is that it doesn't sculpt as crisp an edge as a tool made from something more solid and is less suited for doing hard angles compared to the fairly popular dental tools that a number of sculptors would swear by.

 Next to the wooden clay sculpting tool is possibly the next best thing to sliced bread, in my opinion, in terms of shaping Green Stuff: a roughly pencil-length "clay shaper." One tip is somewhat scalpel- or chisel-shaped and the other is round and comes to a point with a slope similar to a 45° angle sharpened pencil - the great thing about clay shapers, and they come in all different tip varieties, is that the rubber ends don't stick to Green Stuff like pretty much everything else does. The unopened package at the bottom of the picture is a 5-in-1 clay tool set produced by Studio by Sculpey that I picked up for cheap at JoAnn Etc. fairly recently, and it hopefully will live up to my expectations - it has similar rounded point and chisel-like tips in the set along the lines of my current clay shaper, but also has interchangeable blade, ball, and needle ends that can all be stored in the container when not in use.

 In working with a roughly 50-50 mixture, you have to let it sit about 20-30 minutes to firm up a bit so it's not as sticky or soft. It's always going to have some tackiness to it, but this is a good thing as it allows you to actually put the stuff somewhere (if you're adding detail to an existing figure, say) and have it stay where you want it. Outside of the rubberized tips of clay shapers, Green Stuff sticks to mostly everything else - the way around this is to use moistened tools, whether that be from saliva, water, or more exotic substances. I generally use a thin layer of Vaseline on my wooden sculpting tool (or whatever else I might be using) in order to position the GS and give it a rough initial shape with gentle nudges. After another brief period of firming time, say, 20 more minutes or so, that's when I find I can go back and start to work on fine details as the GS has turned a bit more rubbery and actually holds molded shape without too much deformation elsewhere. In other words, I'd suggest starting with broad shapes and then work down to fine details over several breaks. An alternate method would simply be to block out rough areas with a certain amount of the stuff and once that's fully set, then use a thinner layer for surface details. My understanding of what many professional epoxy putty sculptors do when they're sculpting figures as a whole, for example, is to establish underlying muscle groups over an armature of some sort, apply the clothes in a second pass, apply smaller details in a 3rd pass, and so on.

Other tips:
  •  It speeds things up when working using multiple layers if you let Green Stuff set under a low-wattage lamp (say, a 40-watt bulb) rather than letting it air-cure, but the down side is that unless well-supported, the GS tends to sag with heat. The maximum working time for GS is roughly an hour to an hour and a half, depending on the temperature of the working environment. Experimenting with various ratios of yellow to blue is also useful, depending on how quickly you want it to set by itself or how malleable you want your sculpting material to be overall.
  • Some people use plain ol' water as a lubricant for sculpting GS - it works great and prevents tools from sticking to the stuff, but unfortunately evaporates fairly quickly. Some use Vaseline to help with sculpting (myself included) - it prevents sticking, takes a long time to rub away to the point where you need to add more, and it easily allows for smooth, finger-burnished finishes on your GS sculpture without much work; the downside is that it leaves behind an oily residue which must be removed completely once the GS has cured otherwise you'll have difficulty in sculpting/painting/priming/etc. over the top of it. Nothing a little bit of dish soap, running water, and a little gentle scrubbing can't take care of, though - at worst, an overnight soak in Simple Green will take care of any leftover petroleum jelly on your sculpting when followed by a gentle scrub with a toothbrush. I'd imagine about halfway between the various properties of water and Vaseline would be saliva. A lot of folks use nothing but saliva to keep their sculpting equipment moistened so as not to stick - personal preference, really. Probably the oddest thing I've heard of to use in working with GS would be the use of a water-based "personal lubricant" like KY, Astroglide, or something similar - it's water based so there's no leftover residue (unlike Vaseline), it doesn't evaporate quickly (unlike water), and it's available in ready supply (unlike saliva, I guess)... I just can't see myself hitting up the condom 'n' lotion aisle of the grocery store for the sake of buying something to use in miniature sculpting, much less explaining it to my family - but to each their own.

  •  The cheapest and easiest way to sculpt with Green Stuff is to not use Green Stuff at all - no slight to Games Workshop (since they're the reason I'm back in this hobby), but their Green Stuff as sold in blister packs and consisting of two ribbons of yellow and blue stuck together is fairly expensive when compared to other options (and wasteful, considering the seam where the two colors meet is already set when you buy it off the shelf). Both Games Workshop and Reaper Miniatures both sell essentially repackaged and higher-priced versions of Kneadatite, as manufactured by Polymeric Systems, Inc. I bought the tube of Kneadatite Blue/Yellow Sculptors Epoxy Putty in the picture above for roughly $11 - holding about 2-3 times the amount of repackaged Green Stuff. (I'm to understand there's eBay stores selling Kneadatite for as little as $6 US or so, even, but I've had my tube for several years now and haven't needed to buy more.) One other good alternative to GS, as shown in my picture, is Milliput - it comes in several different grades of fineness (with White-White being the finest but most expensive) and has a longer set time compared to Green Stuff (roughly 4 hours), but is also able to be drilled, sanded, filed and sets fairly hard. A good workable plan when custom sculpting might be to use a different underlying material, like Milliput, Apoxie Sculpt, sprue, styrene, or even aluminum foil to bulk out a rough shape, and then go back and do detail work with Green Stuff after the fact.

  •  One of the best investments you could get if you're planning on sculpting with Green Stuff frequently is a non-stick flexible baking sheet (containing Teflon). I have one made by Tupperware that I use as a work surface when sculpting with Green Stuff - not only does GS not stick to it whatsoever, but it has metric and English measurements along the edges, can turn any relatively flat surface into a good place to sculpt, and conveniently rolls up compactly for easy storage. (I wouldn't recommend using it for baking after you start rolling around epoxy putty on it, though - I'm sure that can't be at all healthy. The one in the background of my pic above was co-opted upon discovery from our kitchen - with my wife's blessing, of course.)

  •  A small amount of kneaded Green Stuff mixed with decent amounts of pure acetone makes a slurry of paste-like consistency (hence the nail polish remover in the pic at the beginning of this blog entry). This concoction is perfect for spackling into gaps, brushing over unwanted crevices, or when thinned sufficiently can be "painted" over an existing surface to smooth it out. Once set, GS and acetone don't interact at all, but while still firming up they can be mixed together and used for all sorts of things that firmer molding-required GS can't be as easily - like radiation burns, the beginnings of corruption by Chaos, or minor mutation. A word of warning, though - acetone will begin to melt any plastic GW figures into a shapeless mass if spilled (hence the labeled Vallejo dropper bottle I use) and begin to deform surface details even in the amounts you'd use to make a GS paste.
  • A few sheets of plasticard/sheet styrene coated with a fine layer of Vaseline make an excellent press for a blob of Green Stuff between them, if you have something hard to flatten them together against and you take pains to make sure that you're squashing the GS evenly flat. You can always carve squared-off sections of this flattened piece away for use as shoulder pad- or decorative armor trim - the set GS still remains somewhat flexible (depending on your mixing ratio) and can easily be set into position on your figures with CA glue.

LinkWithin

Related Posts with Thumbnails

Followers: